Home Appliance Personal Care
Can I Use Heating Pad on Back While Pregnant?

Pregnancy brings about numerous changes in a woman’s body, often leading to discomforts such as back pain. Many expectant mothers seek relief through various methods, including the use of heating pads. However, the question arises: can I use a heating pad on my back while pregnant? This article delves into the safety, benefits, potential risks, and best practices associated with using heating pads during pregnancy to help you make an informed decision.

Understanding Back Pain During Pregnancy

Common Causes of Back Pain in Pregnancy

Back pain is a prevalent issue among pregnant women, affecting up to 70% of expectant mothers. Several factors contribute to this discomfort:

  • Hormonal Changes: The hormone relaxin is released to loosen ligaments in the pelvis, preparing the body for childbirth. However, this hormone also affects ligaments supporting the spine, leading to instability and pain.
  • Increased Weight and Posture Shifts: As the baby grows, the additional weight shifts the center of gravity, causing strain on the lower back. Poor posture exacerbates this strain, resulting in persistent pain.
  • Muscle Separation: The outward stretching of abdominal muscles can alter the spine’s alignment, increasing the risk of back pain.

When to Seek Medical Advice

While back pain is common, certain symptoms warrant medical attention:

  • Severe Pain: Intense or unrelenting pain may indicate a more serious issue.
  • Fever or Chills: These could signal an infection requiring prompt treatment.
  • Pain Accompanied by Swelling or Redness: This may be a sign of deep vein thrombosis or other complications.

Consulting a healthcare provider ensures that back pain is appropriately managed and that any underlying conditions are addressed.

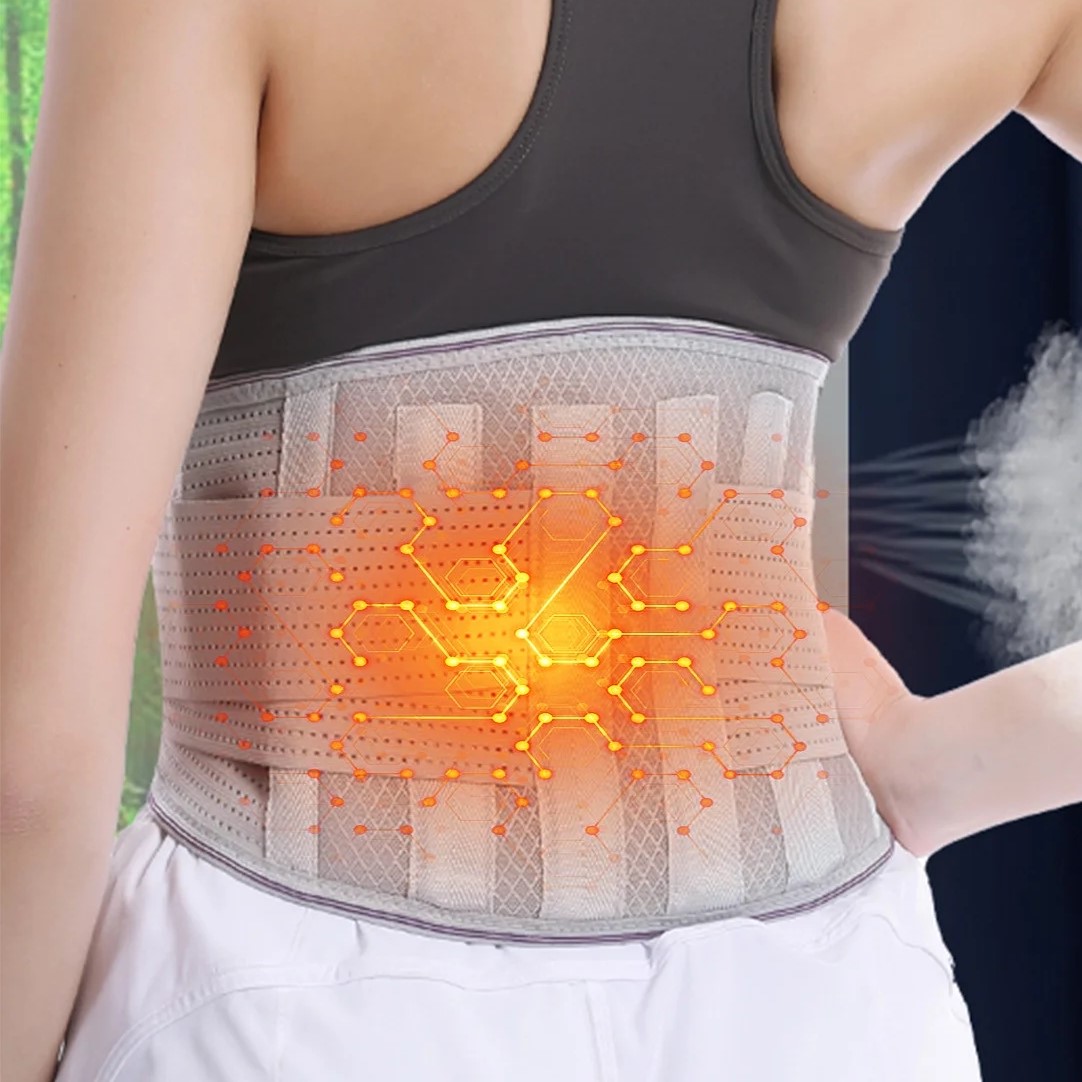
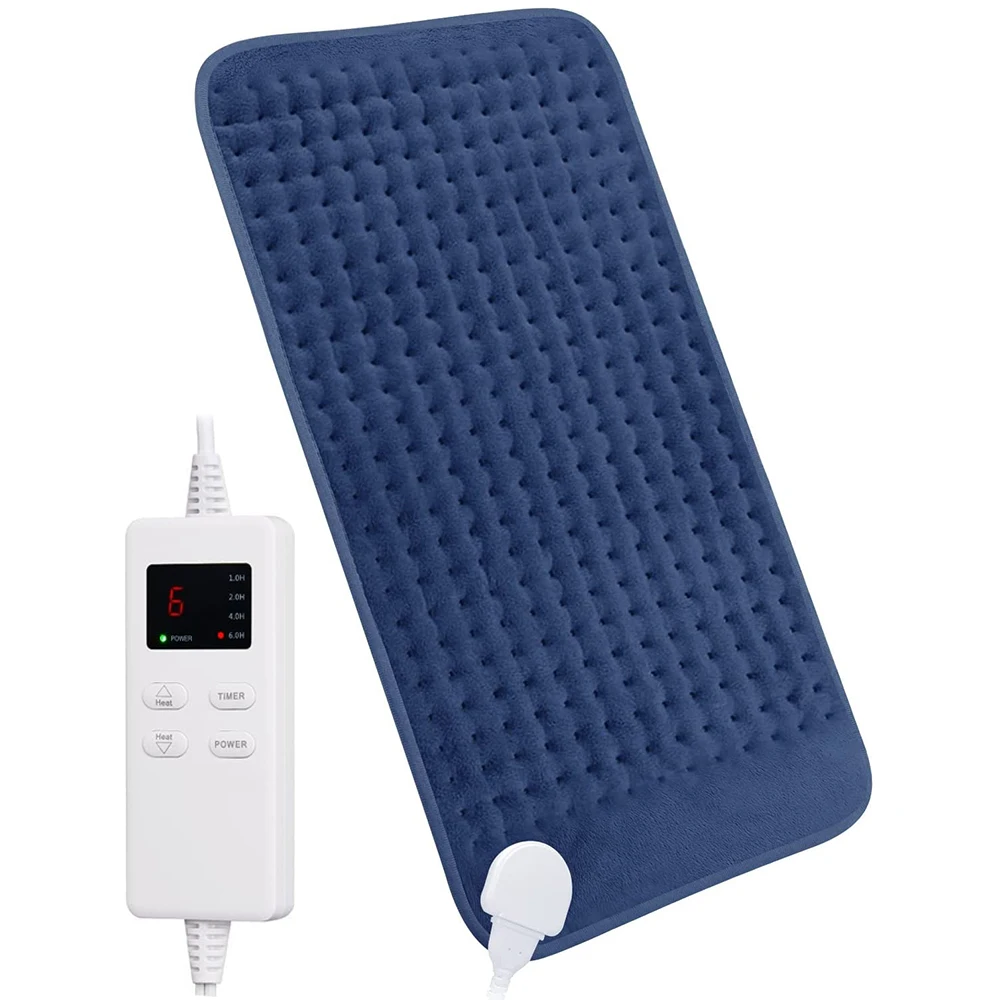
heating pad on back

The Role of Heating Pads in Alleviating Back Pain

How Heating Pads Work

Heating pads provide localized heat therapy, which can help relax muscles, reduce stiffness, and improve blood flow to the affected area. The warmth alleviates discomfort by soothing tense muscles and promoting relaxation.

Benefits of Using Heating Pads During Pregnancy

Using a heating pad can offer several advantages for pregnant women experiencing back pain:

  • Muscle Relaxation: Heat helps to loosen tight muscles, providing relief from tension-related pain.
  • Improved Circulation: Enhanced blood flow promotes healing and reduces inflammation in sore areas.
  • Stress Reduction: The comforting warmth can alleviate stress and contribute to overall well-being.

Potential Risks and Precautions

While heating pads can be beneficial, certain precautions are necessary to ensure safety during pregnancy:

  • Temperature Control: Excessive heat can pose risks to both mother and baby. It is crucial to use low to medium settings to prevent overheating.
  • Duration of Use: Limit application to 15-20 minutes at a time to avoid prolonged exposure to heat.
  • Avoiding Direct Contact: Place a cloth or towel between the heating pad and the skin to prevent burns.

Can I Use a Heating Pad on My Back While Pregnant?

Safety Considerations

The short answer is yes, you can use a heating pad on your back while pregnant, provided you follow certain safety guidelines. It’s essential to use the heating pad correctly to minimize any potential risks to you and your developing baby.

Recommended Usage Guidelines

To safely use a heating pad during pregnancy, adhere to the following recommendations:

  1. Choose the Right Heating Pad: Opt for an electric heating pad with adjustable temperature settings. Avoid using hot water bottles or chemical heat packs, as they may not offer precise temperature control.
  2. Moderate Temperature: Set the heating pad to a low or medium setting. Excessive heat can elevate your body temperature, which is not advisable during pregnancy.
  3. Time Limits: Limit the application of the heating pad to 15-20 minutes at a time. Prolonged use can lead to overheating and dehydration.
  4. Protective Barrier: Always place a thin cloth or towel between the heating pad and your skin to prevent burns or irritation.
  5. Monitor Your Body’s Response: Pay attention to how your body reacts. If you experience increased discomfort, dizziness, or unusual symptoms, discontinue use and consult your healthcare provider.

Alternatives to Heating Pads

If you’re hesitant about using a heating pad, consider these alternative methods for relieving back pain during pregnancy:

  • Cold Therapy: Applying an ice pack can reduce inflammation and numb sharp pain.
  • Prenatal Massage: Gentle massages by a certified therapist can alleviate muscle tension and improve circulation.
  • Proper Ergonomics: Maintaining good posture and using supportive chairs can prevent and reduce back pain.
  • Exercise and Stretching: Regular, pregnancy-safe exercises strengthen back muscles and enhance flexibility.

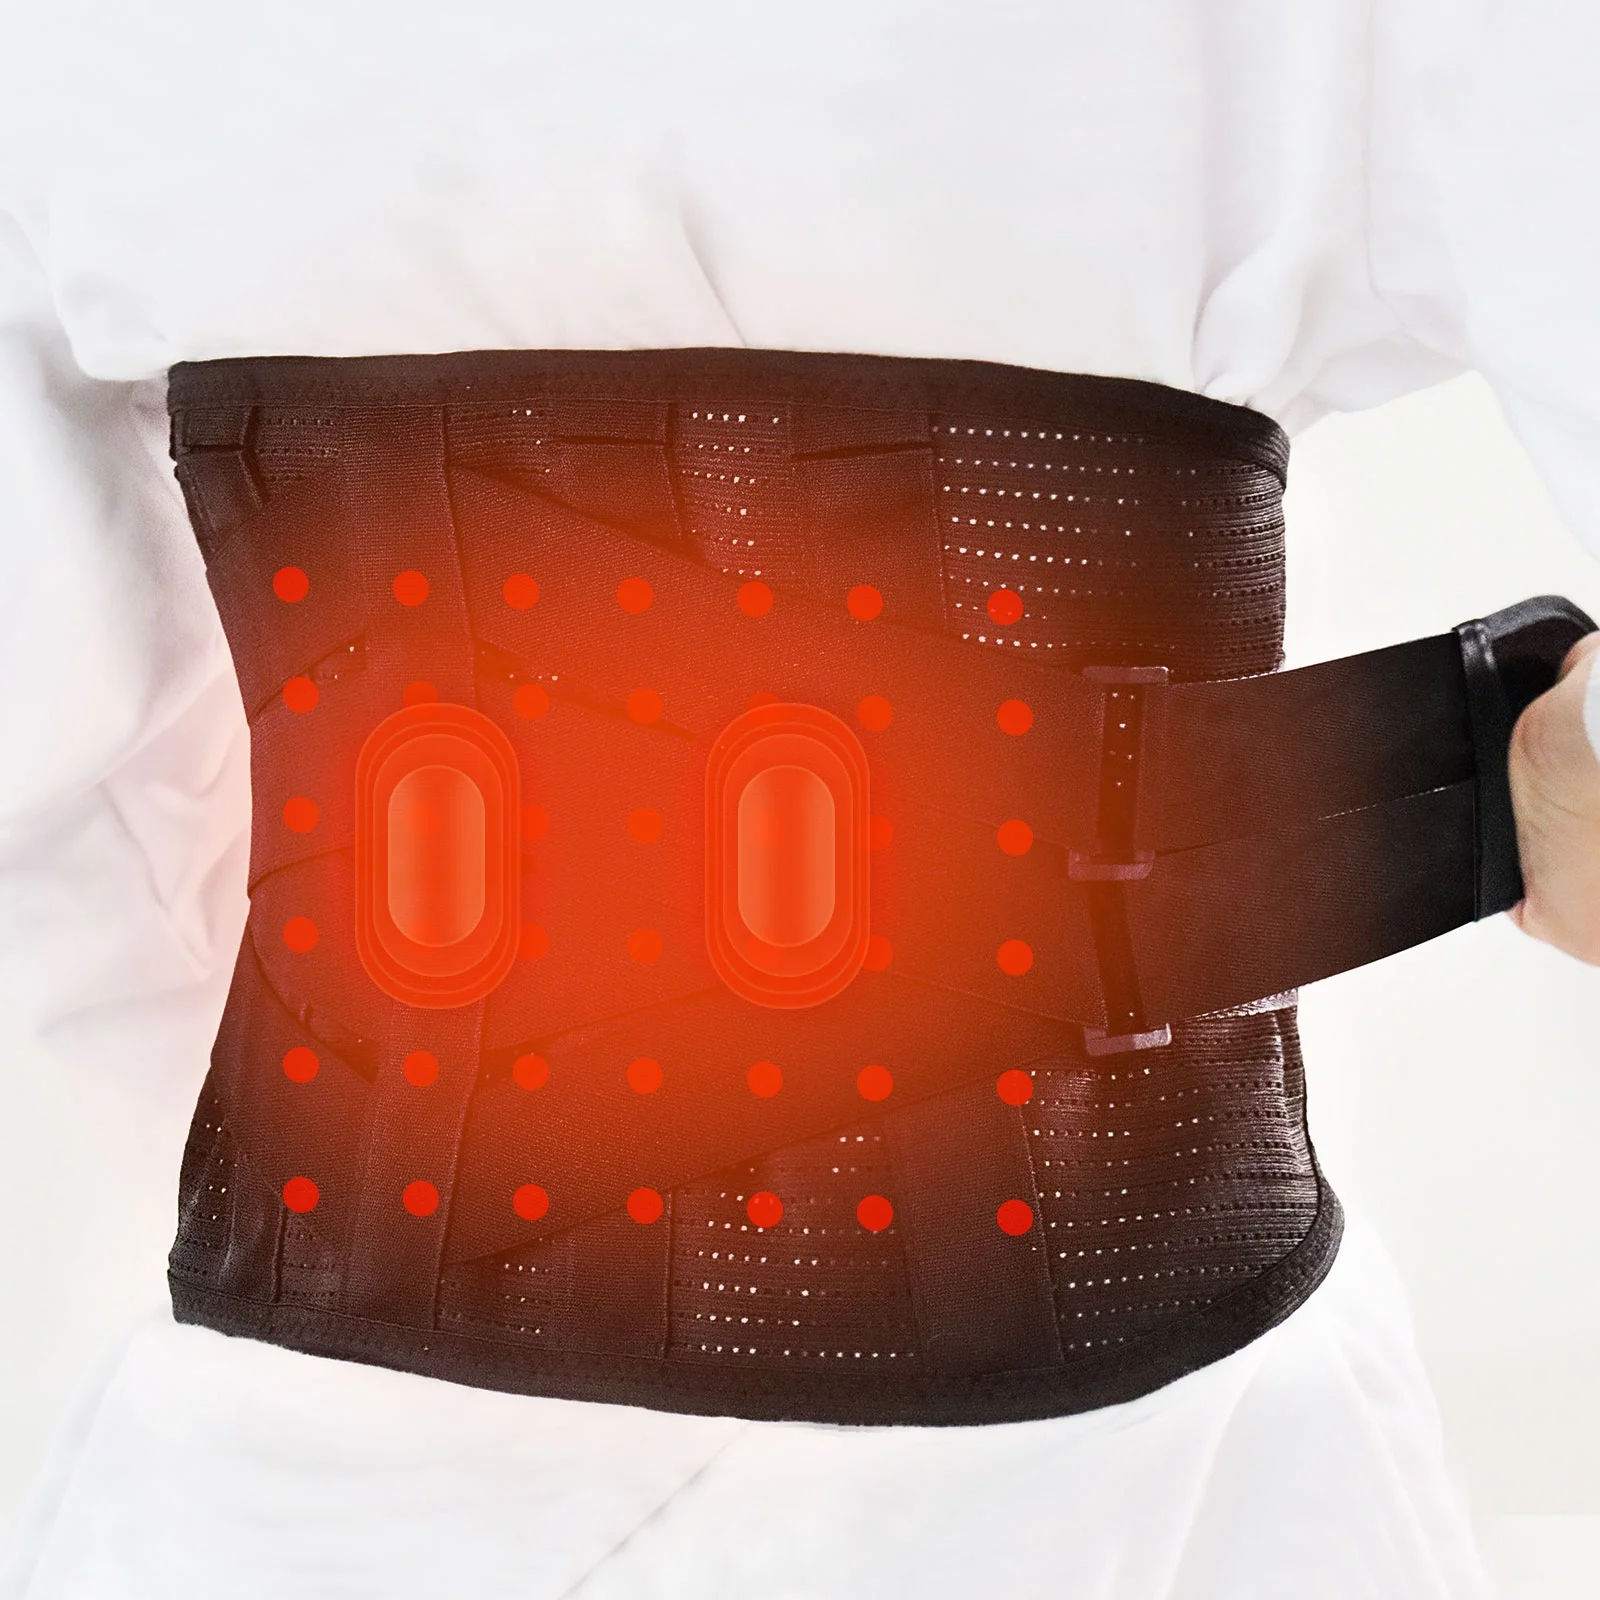
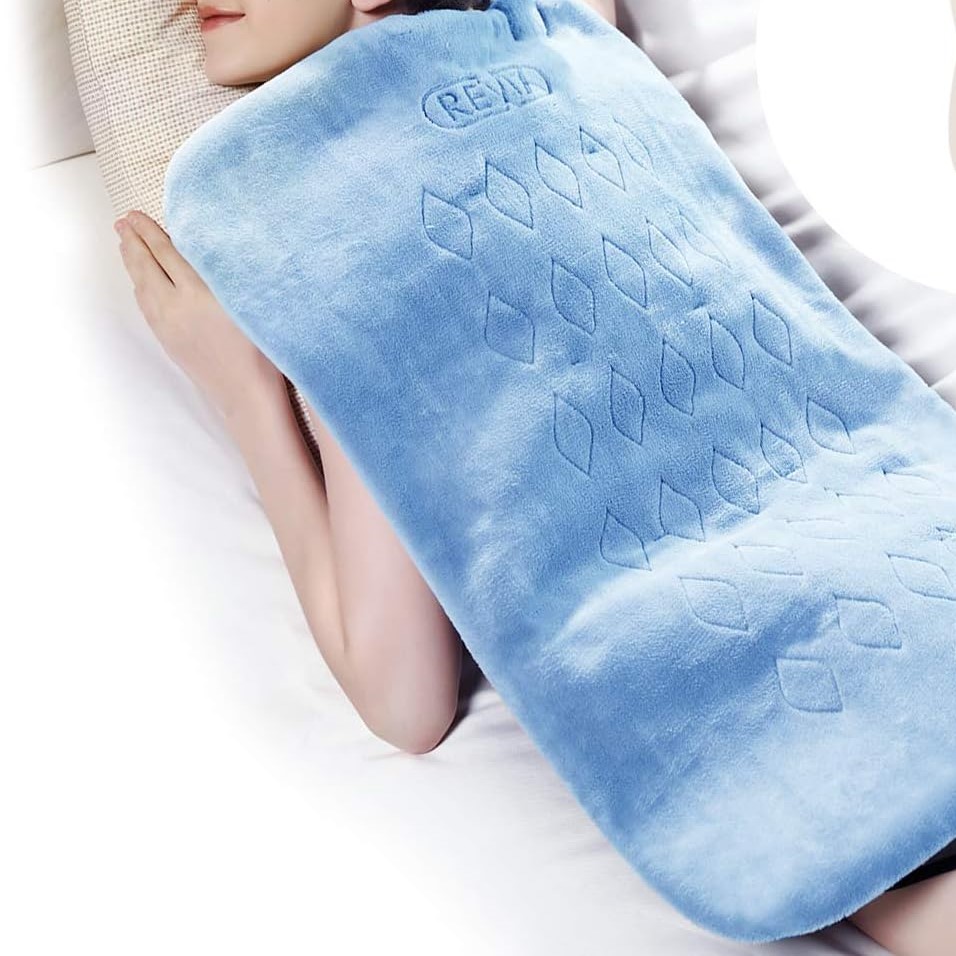
heating pad on back

Expert Opinions on Heating Pad Use During Pregnancy

Perspectives from Obstetricians

Many obstetricians agree that heating pads can be safely used during pregnancy when applied correctly. They emphasize the importance of controlling the temperature and limiting the duration of use to prevent potential risks such as overheating or dehydration.

Insights from Physical Therapists

Physical therapists often recommend heating pads as part of a comprehensive pain management plan for pregnant women. They suggest combining heat therapy with stretching exercises and proper posture techniques to maximize relief from back pain.

Recommendations from Certified Massage Therapists

Certified massage therapists highlight the benefits of heat therapy in enhancing the effectiveness of massages. The warmth from a heating pad can prepare muscles for massage, making the treatment more effective in reducing pain and promoting relaxation.

Best Practices for Using Heating Pads Safely

Selecting the Appropriate Heating Pad

When choosing a heating pad, consider the following factors:

  • Adjustable Settings: Ensure the pad has multiple temperature levels to allow precise control.
  • Auto Shut-Off Feature: This feature prevents the pad from remaining on for extended periods, reducing the risk of overheating.
  • Size and Flexibility: A pad that contours to your back shape ensures even heat distribution and maximum comfort.

Proper Application Techniques

To use a heating pad effectively and safely, follow these steps:

  1. Preparation: Wrap the heating pad in a towel or cloth to create a barrier between the pad and your skin.
  2. Placement: Position the pad on the area where you feel pain, typically the lower back.
  3. Setting the Temperature: Start with a low setting and gradually increase if necessary, ensuring the heat is comfortable and not too intense.
  4. Duration: Limit each session to 15-20 minutes to prevent prolonged heat exposure.
  5. Monitoring: Regularly check the temperature of the pad and your skin to avoid burns.

Combining Heat Therapy with Other Treatments

Integrating heating pad use with other treatment modalities can enhance pain relief:

  • Exercise: Incorporate gentle stretching or prenatal yoga to complement the muscle relaxation provided by heat therapy.
  • Massage: Utilize massages in conjunction with heat therapy for deeper muscle relaxation and improved circulation.
  • Ergonomic Adjustments: Modify your workspace or daily activities to support better posture and reduce strain on your back.

Potential Risks of Using Heating Pads During Pregnancy

Overheating and Its Implications

One of the primary concerns with heating pad use during pregnancy is the risk of overheating. Elevated body temperatures, especially in the first trimester, have been linked to neural tube defects and other developmental issues in the fetus. Therefore, it’s crucial to ensure that the heating pad does not cause your body temperature to rise excessively.

Skin Burns and Irritation

Improper use of a heating pad can lead to skin burns or irritation. This risk is heightened if the pad is used at high temperatures or left on for extended periods. Always use a barrier between the pad and your skin and adhere to recommended usage times to mitigate this risk.

Dehydration Risks

Prolonged use of heating pads can contribute to dehydration, particularly if combined with sweating caused by excessive heat. Dehydration poses risks such as low amniotic fluid levels and preterm labor. To prevent dehydration, stay hydrated by drinking plenty of water, especially if you are using heat therapy frequently.

Interference with Blood Flow

While heat therapy generally improves blood circulation, excessive heat can sometimes constrict blood vessels, leading to reduced blood flow. This can exacerbate discomfort and potentially affect the delivery of essential nutrients to your baby.

Alternative Pain Relief Methods During Pregnancy

Cold Therapy Options

Cold therapy, such as using ice packs or cold compresses, can provide effective pain relief, especially for sharp or acute pain. Unlike heat therapy, cold therapy helps numb the area and reduce inflammation.

Prenatal Yoga and Stretching Exercises

Engaging in prenatal yoga or gentle stretching exercises can strengthen the muscles supporting your back, improving flexibility and reducing pain. These activities also promote relaxation and stress relief.

Acupuncture and Acupressure

Alternative therapies like acupuncture and acupressure have gained popularity for managing back pain during pregnancy. These methods involve stimulating specific points on the body to alleviate pain and improve overall well-being.

Supportive Devices

Using supportive devices such as maternity belts, ergonomic chairs, or specially designed pillows can significantly reduce back strain. These tools help maintain proper posture and provide additional support to the back muscles.

When to Avoid Using a Heating Pad

High-Risk Pregnancy Conditions

Certain pregnancy complications make the use of heating pads inadvisable. Conditions such as preeclampsia, placental issues, or signs of preterm labor require immediate medical attention, and heat therapy should be avoided unless approved by a healthcare provider.

Specific Medical Advice

Always follow the guidance of your healthcare provider regarding the use of heating pads. If you have any medical conditions or concerns, consult your doctor before incorporating heat therapy into your pain management routine.

Signs of Overheating or Burns

If you notice any signs of overheating, such as dizziness, excessive sweating, or skin redness, discontinue the use of the heating pad immediately. Seek medical advice if necessary to ensure your safety and that of your baby.
heating pad on backFrequently Asked Questions

Can I Use a Heating Pad During All Trimesters?

While heating pads can be used during any trimester, it’s essential to exercise caution, particularly during the first trimester when the risk of neural tube defects is higher. Always maintain moderate temperatures and limit usage duration throughout pregnancy.

Are There Safer Alternatives to Heating Pads?

Yes, alternatives such as cold therapy, prenatal massages, and specific stretching exercises can provide effective pain relief without the risks associated with heat therapy. Discuss these options with your healthcare provider to determine the best approach for your situation.

How Often Can I Use a Heating Pad?

It’s generally safe to use a heating pad a few times a day, provided you adhere to the recommended temperature settings and limit each session to 15-20 minutes. However, consult your healthcare provider for personalized advice based on your individual health needs.

Can Heating Pads Affect My Baby?

When used correctly, heating pads pose minimal risk to the baby. The primary concern is preventing maternal overheating, which can indirectly affect fetal development. By following safety guidelines, you can safely use a heating pad without harming your baby.

What Should I Do If I Experience Adverse Effects?

If you experience any adverse effects such as burns, excessive sweating, dizziness, or increased pain, stop using the heating pad immediately and seek medical attention. Your healthcare provider can offer guidance and alternative pain relief methods tailored to your needs.

Final Thoughts on Using Heating Pads During Pregnancy

In conclusion, can I use heating pad on back while pregnant? Yes, you can, provided you follow essential safety guidelines to protect both yourself and your baby. Heating pads can effectively alleviate back pain during pregnancy by relaxing muscles, improving circulation, and reducing discomfort.
Home Appliance Personal Care
Troubleshooting Sunbeam Heating Pad Not Working

Common Issues with Sunbeam Heating Pads

Dealing with a Sunbeam heating pad that’s not working can be frustrating. Users often report a couple of common problems that interfere with their heating pad’s functionality.

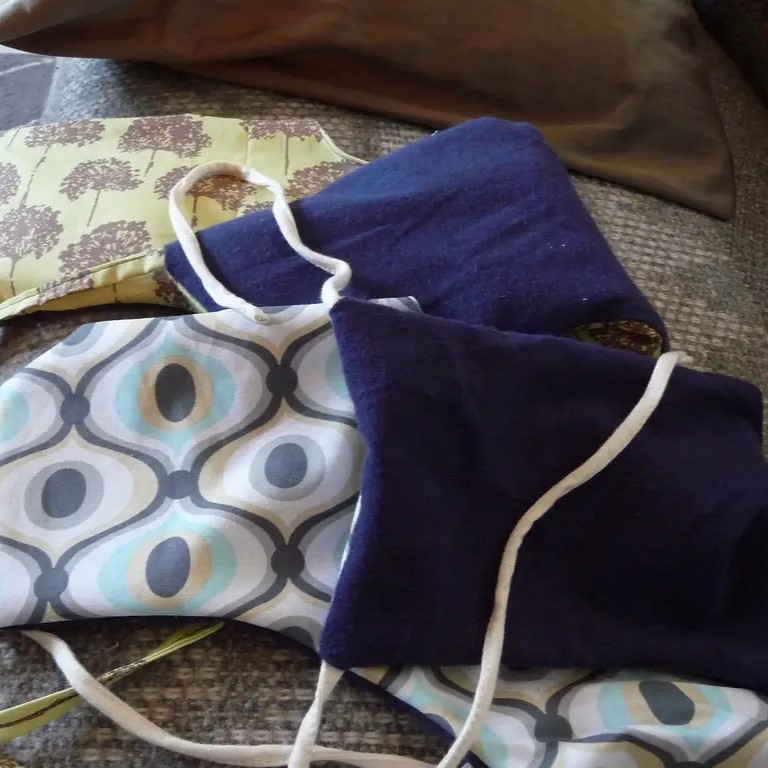
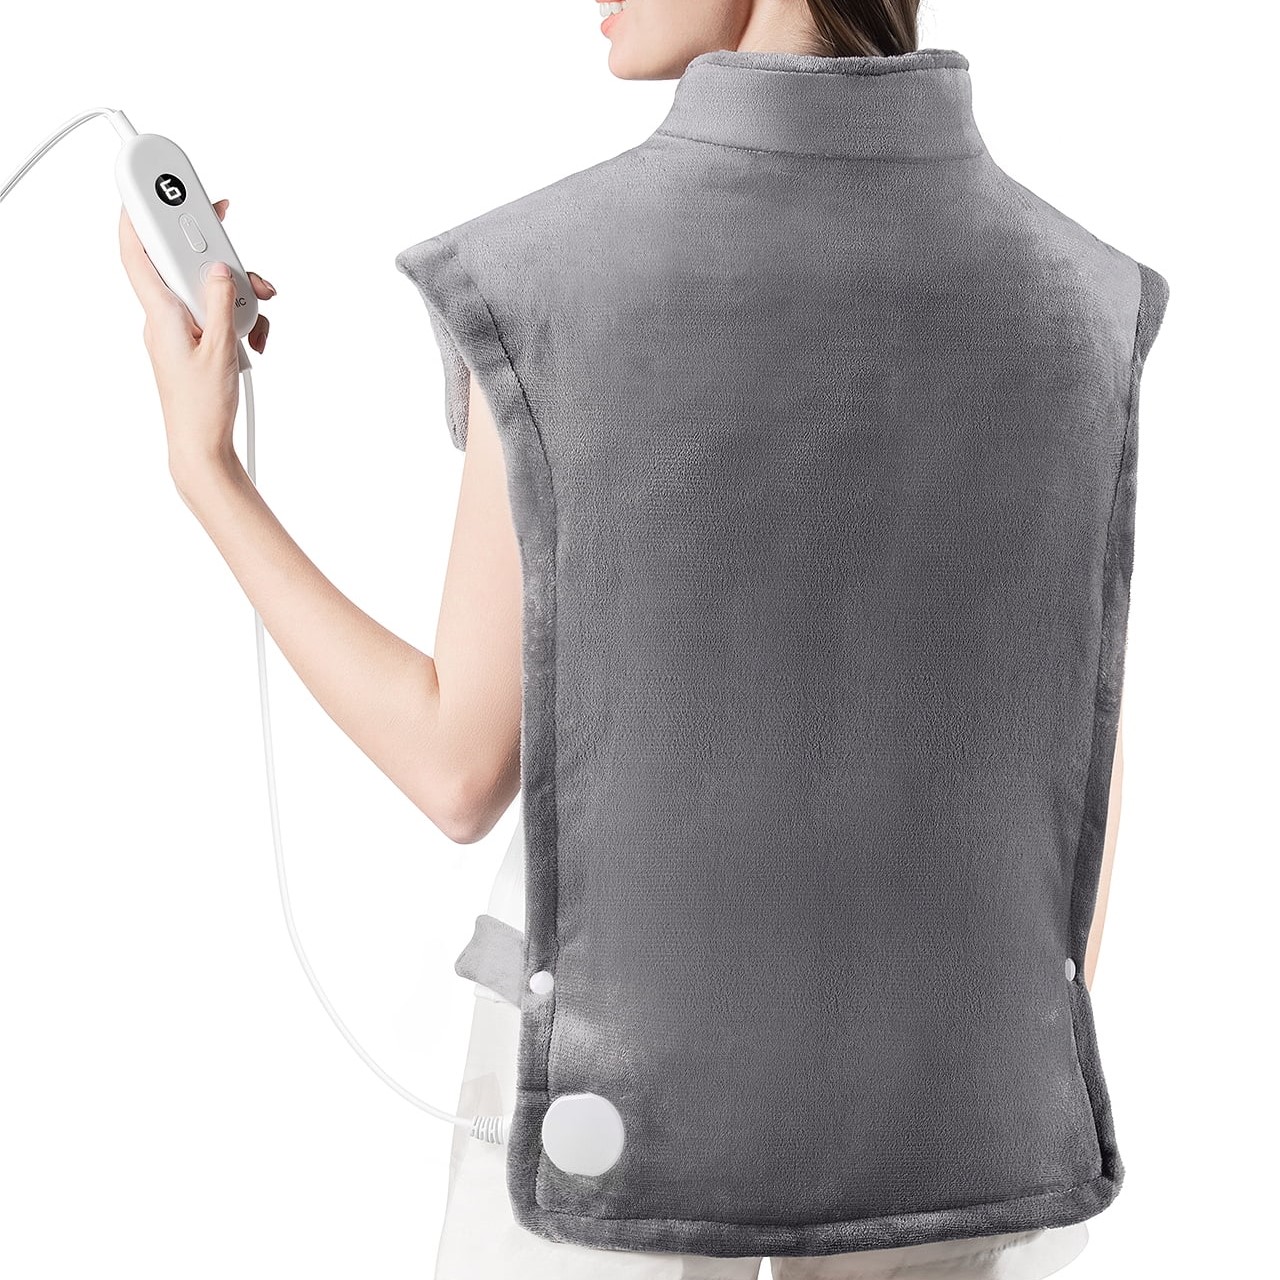
sunbeam heating pad

Faulty Wiring

Faulty wiring is a frequent culprit when your Sunbeam heating pad fails to operate correctly. Signs of this issue include the pad not heating up, heating inconsistently, or turning off unexpectedly. It’s crucial to handle wiring problems carefully. Exposure to faulty wires can pose safety risks. Ensure the device is unplugged before any inspection.

Inconsistent Heating

Inconsistent heating is another common complaint among Sunbeam heating pad users. This may manifest as the pad heating at varying levels or not maintaining the set temperature. This inconsistency can stem from internal control malfunctions or external factors like environmental temperatures. Keeping the pad away from drafts and ensuring it’s spread flat during use can mitigate this issue.

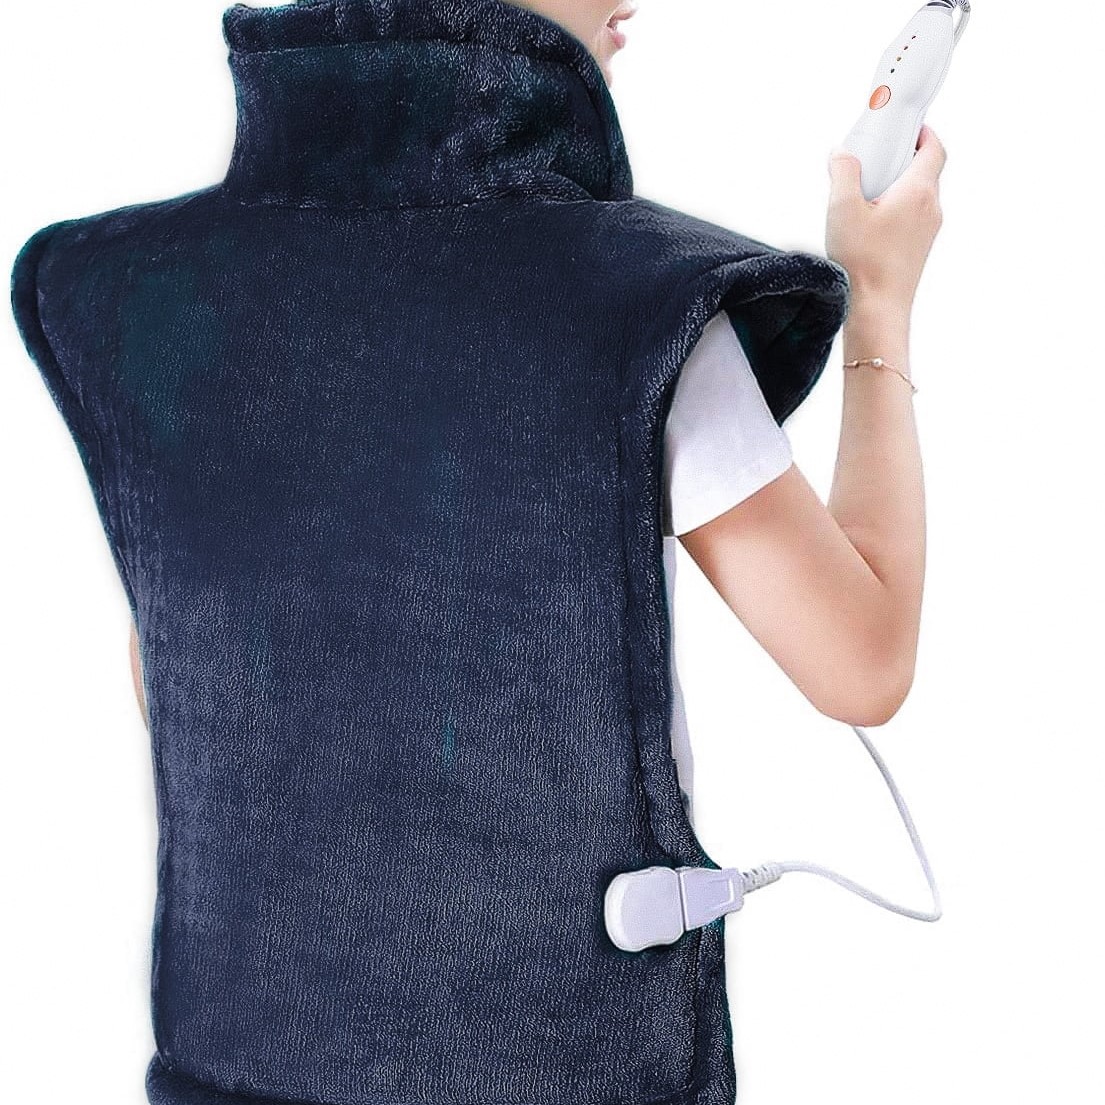
sunbeam heating pad

Step-by-Step Guide to Diagnosing Problems

Diagnosing why your Sunbeam heating pad is not working involves systematic troubleshooting.

Checking the Power Supply

First, check if the heating pad is properly plugged into the outlet. Ensure the cord and plug are not damaged. If using a power strip, confirm it’s on and functioning. No lights or indicators? Test the outlet with another device.

Inspecting the Heating Element

If the power supply is fine, next examine the heating element. Feel for cold spots that could suggest a breakdown inside. If parts of the pad won’t heat, there may be an issue with the internal wiring or the control unit. Don’t attempt to open the pad; this is for professionals.

Safety Tips While Using Heating Pads

When using a Sunbeam heating pad, safety is key. Remember these tips to avoid harm.

Proper Handling and Usage

Always read the manual before use. Start with lower heat settings, then adjust as needed. Keep the pad flat on your body. Do not bend or fold it when it’s on. If you feel discomfort, turn it off immediately. Never use a pad with exposed wires or damaged materials.

What to Avoid to Prevent Damage

To prevent damage to your Sunbeam heating pad, never sit or lie on it. Do not use it with wet skin or in damp places. Keep sharp objects away, they can tear the fabric. Do not wash it unless the label says it’s washable. Avoid crumpling the pad; store it rolled or folded neatly. Stay vigilant while it’s in use, and never leave it unattended when switched on.

Maintenance and Care for Longevity

To ensure your Sunbeam heating pad lasts, proper maintenance and care are essential. Regular upkeep not only enhances performance but also extends the lifespan of your device. Here, we will discuss how to keep your heating pad in top condition through cleaning and correct storage.

Regular Cleaning Recommendations

Keeping your Sunbeam heating pad clean is crucial for its functionality and longevity. First, always unplug the pad before cleaning. Check the manufacturer’s label for specific cleaning instructions. Generally, unless indicated otherwise, use a damp cloth with mild detergent to gently wipe the surface. Avoid using harsh chemicals, as they can degrade the pad’s materials. Allow the pad to dry completely before plugging it back in or storing it. Regular cleaning prevents build-up of dirt and oils, which can affect heating efficiency.

Storage Tips

Proper storage is as important as cleaning. When not in use, carefully fold or roll the heating pad as specified in the user manual to avoid damaging internal wires. Store the pad in a cool, dry place away from direct sunlight; extreme temperatures and moisture can harm the pad’s materials and electrical components. Avoid placing heavy objects on it to prevent any potential damage to the wiring or heating elements. Following these simple tips can greatly contribute to the durability of your Sunbeam heating pad.

When to Seek Professional Help

Sometimes, you might face problems with your Sunbeam heating pad that basic troubleshooting can’t fix. In such cases, it’s vital to seek help from professionals. Below are signs that professional service is necessary.

Identifying Issues Beyond Basic Troubleshooting

If you notice any of these issues with your Sunbeam heating pad, it may be time to get professional help:

  • The heating pad is making strange noises.
  • There’s a burning smell coming from the pad.
  • The control panel doesn’t respond or has visible damage.
  • The fabric cover has significant burns or discoloration.
  • The pad continues to have cold spots, even after ensuring proper power supply and function.

These symptoms might point to more severe internal problems. A qualified technician should handle them to ensure safety and proper repair.

Warranty and Repair Services

Check if your Sunbeam heating pad is under warranty. The warranty might cover repairs or replace your pad at no extra cost. Contact Sunbeam’s customer service for information on warranty terms and how to proceed with a claim. Keep your purchase receipt and any warranty cards handy. These will help speed up the process.

If the warranty has expired, you can still get professional repair services. Ask customer service for authorized repair centers or look for reliable electronic repair shops. Remember, attempting repairs on your own might be dangerous and can void any remaining warranty. Always prioritize safety and professionalism when your Sunbeam heating pad is not working.

sunbeam heating padAlternative Solutions and Replacements

Sometimes a Sunbeam heating pad may be beyond repair, or you could simply be in the market for a new product. When a Sunbeam heating pad is not working, and repairs are not a viable option, consider alternative solutions and replacements to meet your needs. In this portion of the blog, we will explore the steps you should take when thinking about upgrading your heating pad or looking into other brands.

Considering Upgrades

When your current heating pad doesn’t cut it anymore, upgrading can be a smart move. Modern heating pads come with advanced features like auto shut-off, multiple heat settings, and improved heat distribution. Before making a purchase, research the latest models and compare their features to your current pad. Look for products with good reviews, reliable customer support, and compelling warranties. The right upgrade can enhance your experience and offer better pain relief.

Exploring Other Brands and Options

Brand loyalty is common, but exploring other options might help you find a better fit for your needs. There are many reputable brands with high-quality heating pads on the market. Seek ones with positive user ratings and known for durability. Check out consumer electronics forums, product comparison sites, and customer reviews to gather information. Options like microwavable pads, infrared heat therapy devices, and electric blanket alternatives might be worth considering. Ensure any new heating pad has the necessary safety features and adheres to your needs in terms of size, material, and heat settings. By doing thorough research, you’ll be better equipped to make a well-informed decision on your next heating pad purchase or alternative solution.

Conclusion

Experiencing issues with your Sunbeam heating pad can be an inconvenience; however, through careful troubleshooting, you can often restore its function. Always start with the basics by checking the power source, examining the cord and control unit, and testing the heating element. If none of these steps bear fruit, consider professional evaluation, and explore alternative heat sources temporarily. By understanding the common problems and taking preventative measures, you can enjoy a consistently reliable heating pad in the future.

Home Appliance Personal Care
Relieving Pain with a Herniated Disc Heating Pad

Introduction to Herniated Discs and Home Remedies

Experiencing sudden or chronic back pain can often be a sign of a herniated disc. These discs sit between the vertebrae in your spine and are vital to its flexibility and function. When a disc herniates, its inner, gel-like core pushes through the outer layer and presses against nearby nerves. This can cause discomfort ranging from mild aches to severe, sharp pains. Typically, those aged between 30 and 50 are most susceptible to herniated discs. Finding relief from this pain can be challenging, but there are various home remedies that can help. The keywords here, ‘herniated disc heating pad’, indicate that heat therapy is one of the popular methods for aiding disc discomfort. While it’s no cure-all, heat can increase blood flow and soothe muscle tension in the affected area.

However, it’s not just about applying heat. Effective management of herniated disc pain can also involve cold therapy to reduce inflammation, physical activity to strengthen back muscles, and adapting sleep positions to minimize stress on the spine. Over-the-counter pain relievers, myofascial release techniques, and hydrotherapy are additional options that can offer some respite. For persistent cases that do not respond well to these remedies, minimally invasive surgery may be considered.

herniated disc heating pad

In the subsequent sections, we’ll delve into each of these home treatment approaches, explaining how they can ease the pain associated with herniated discs and improve your overall quality of life.

Heat Therapy: Using Heating Pads for Relief

Heat therapy has long been recognized for its soothing qualities, especially when it comes to back pain. Incorporating a ‘herniated disc heating pad’ into your self-care routine can significantly improve blood circulation to the affected area and accelerate healing. The gentle warmth from the pad not just eases muscle tension but also aids in reducing pain caused by nerve irritation.

When applying a heating pad, you should follow a set of guidelines to ensure safety and effectiveness:

  1. Use Low to Medium Heat: Start with low to medium heat settings to avoid burns.
  2. Limit Heat Application: Apply the heating pad for short periods, ideally 15 to 20 minutes at a time.
  3. Add Insulation: Cover the heating pad with a cloth to protect your skin.
  4. Stay Alert: Never fall asleep with the heating pad on to prevent skin damage.

Alongside these precautions, consider alternate heating options if a pad isn’t available. These include warm showers, heated gel packs, or warm baths.

However, it’s important to note that heat therapy is not a singular solution. It’s most effective when combined with other treatment methods like cold therapy, exercises, and over-the-counter medication. This multifaceted approach can offer a more comprehensive plan for alleviating the discomfort of a herniated disc.

Cold Therapy: The Role of Ice Packs in Reducing Inflammation

While heat therapy aids in soothing and healing, cold therapy focuses on reducing inflammation. Inflammation often accompanies a herniated disc, contributing to increased pain and discomfort. Implementing cold therapy can significantly help in managing these symptoms.

Here’s how to effectively use ice packs for herniated disc pain relief:

  1. Choose the Right Ice Pack: Use a flexible gel ice pack that conforms to your body.
  2. Wrap the Ice Pack: Always wrap the ice pack in a thin towel to protect your skin from frostbite.
  3. Apply to Affected Area: Place the ice pack directly over the painful area.
  4. Timing is Key: Apply the ice pack for about 15-20 minutes at a time. Repeat every hour as needed.
  5. Combine with Rest: While using cold therapy, take the time to rest the affected area.

It’s important to alternate between cold and heat therapy for the best results. After using an ice pack, allow the body area to return to normal temperature before applying heat. This combination helps in better managing herniated disc symptoms by alternating methods of pain relief and promoting overall recovery.

Always monitor your skin and sensations while using ice packs, and consult with a healthcare professional if you experience adverse reactions like skin damage or increased pain.

Physical Activity: Low Impact Exercises and Stretches

Physical activity can greatly aid in managing herniated disc pain. Low-impact exercises and stretches ease pressure on the spine. They can strengthen back muscles and promote healing. Here are some recommended activities:

  1. Walking: It’s gentle on the back and provides good cardiovascular benefits.
  2. Swimming: The buoyancy of water reduces stress on the spine, making it a good choice.
  3. Yoga: It helps in stretching and strengthening muscles, with poses tailored to your comfort level.
  4. Stationary Biking: A non-impact exercise that can improve endurance and spinal stability.

Incorporate stretching into your routine to maintain flexibility and decrease nerve pressure. Here are some simple stretches to try:

  1. Knee-to-Chest Stretch: Gently pulls the spine and alleviates nerve compression.
  2. Pelvic Tilt: This stretch tightens abdominal muscles and supports the lower back.
  3. Child’s Pose: A relieving stretch for the back muscles, often used in yoga.

When engaging in physical activity, always start slow and build up as your comfort allows. Never overstretch, and if pain increases, stop exercising and consult a healthcare professional.

It’s important to note that while exercises can help, they are more effective when used in combination with other treatments like heat and cold therapy. Consult with a physical therapist to get a personalized exercise plan suitable for your condition.

herniated disc heating padAdapting Sleep Positions to Ease Herniated Disc Pain
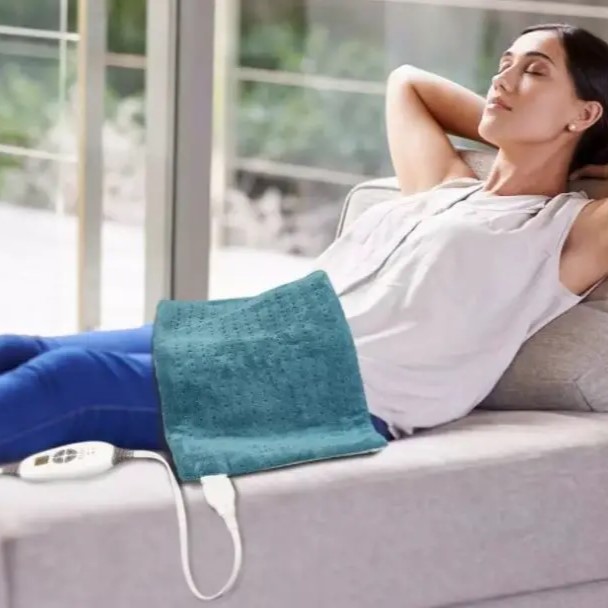
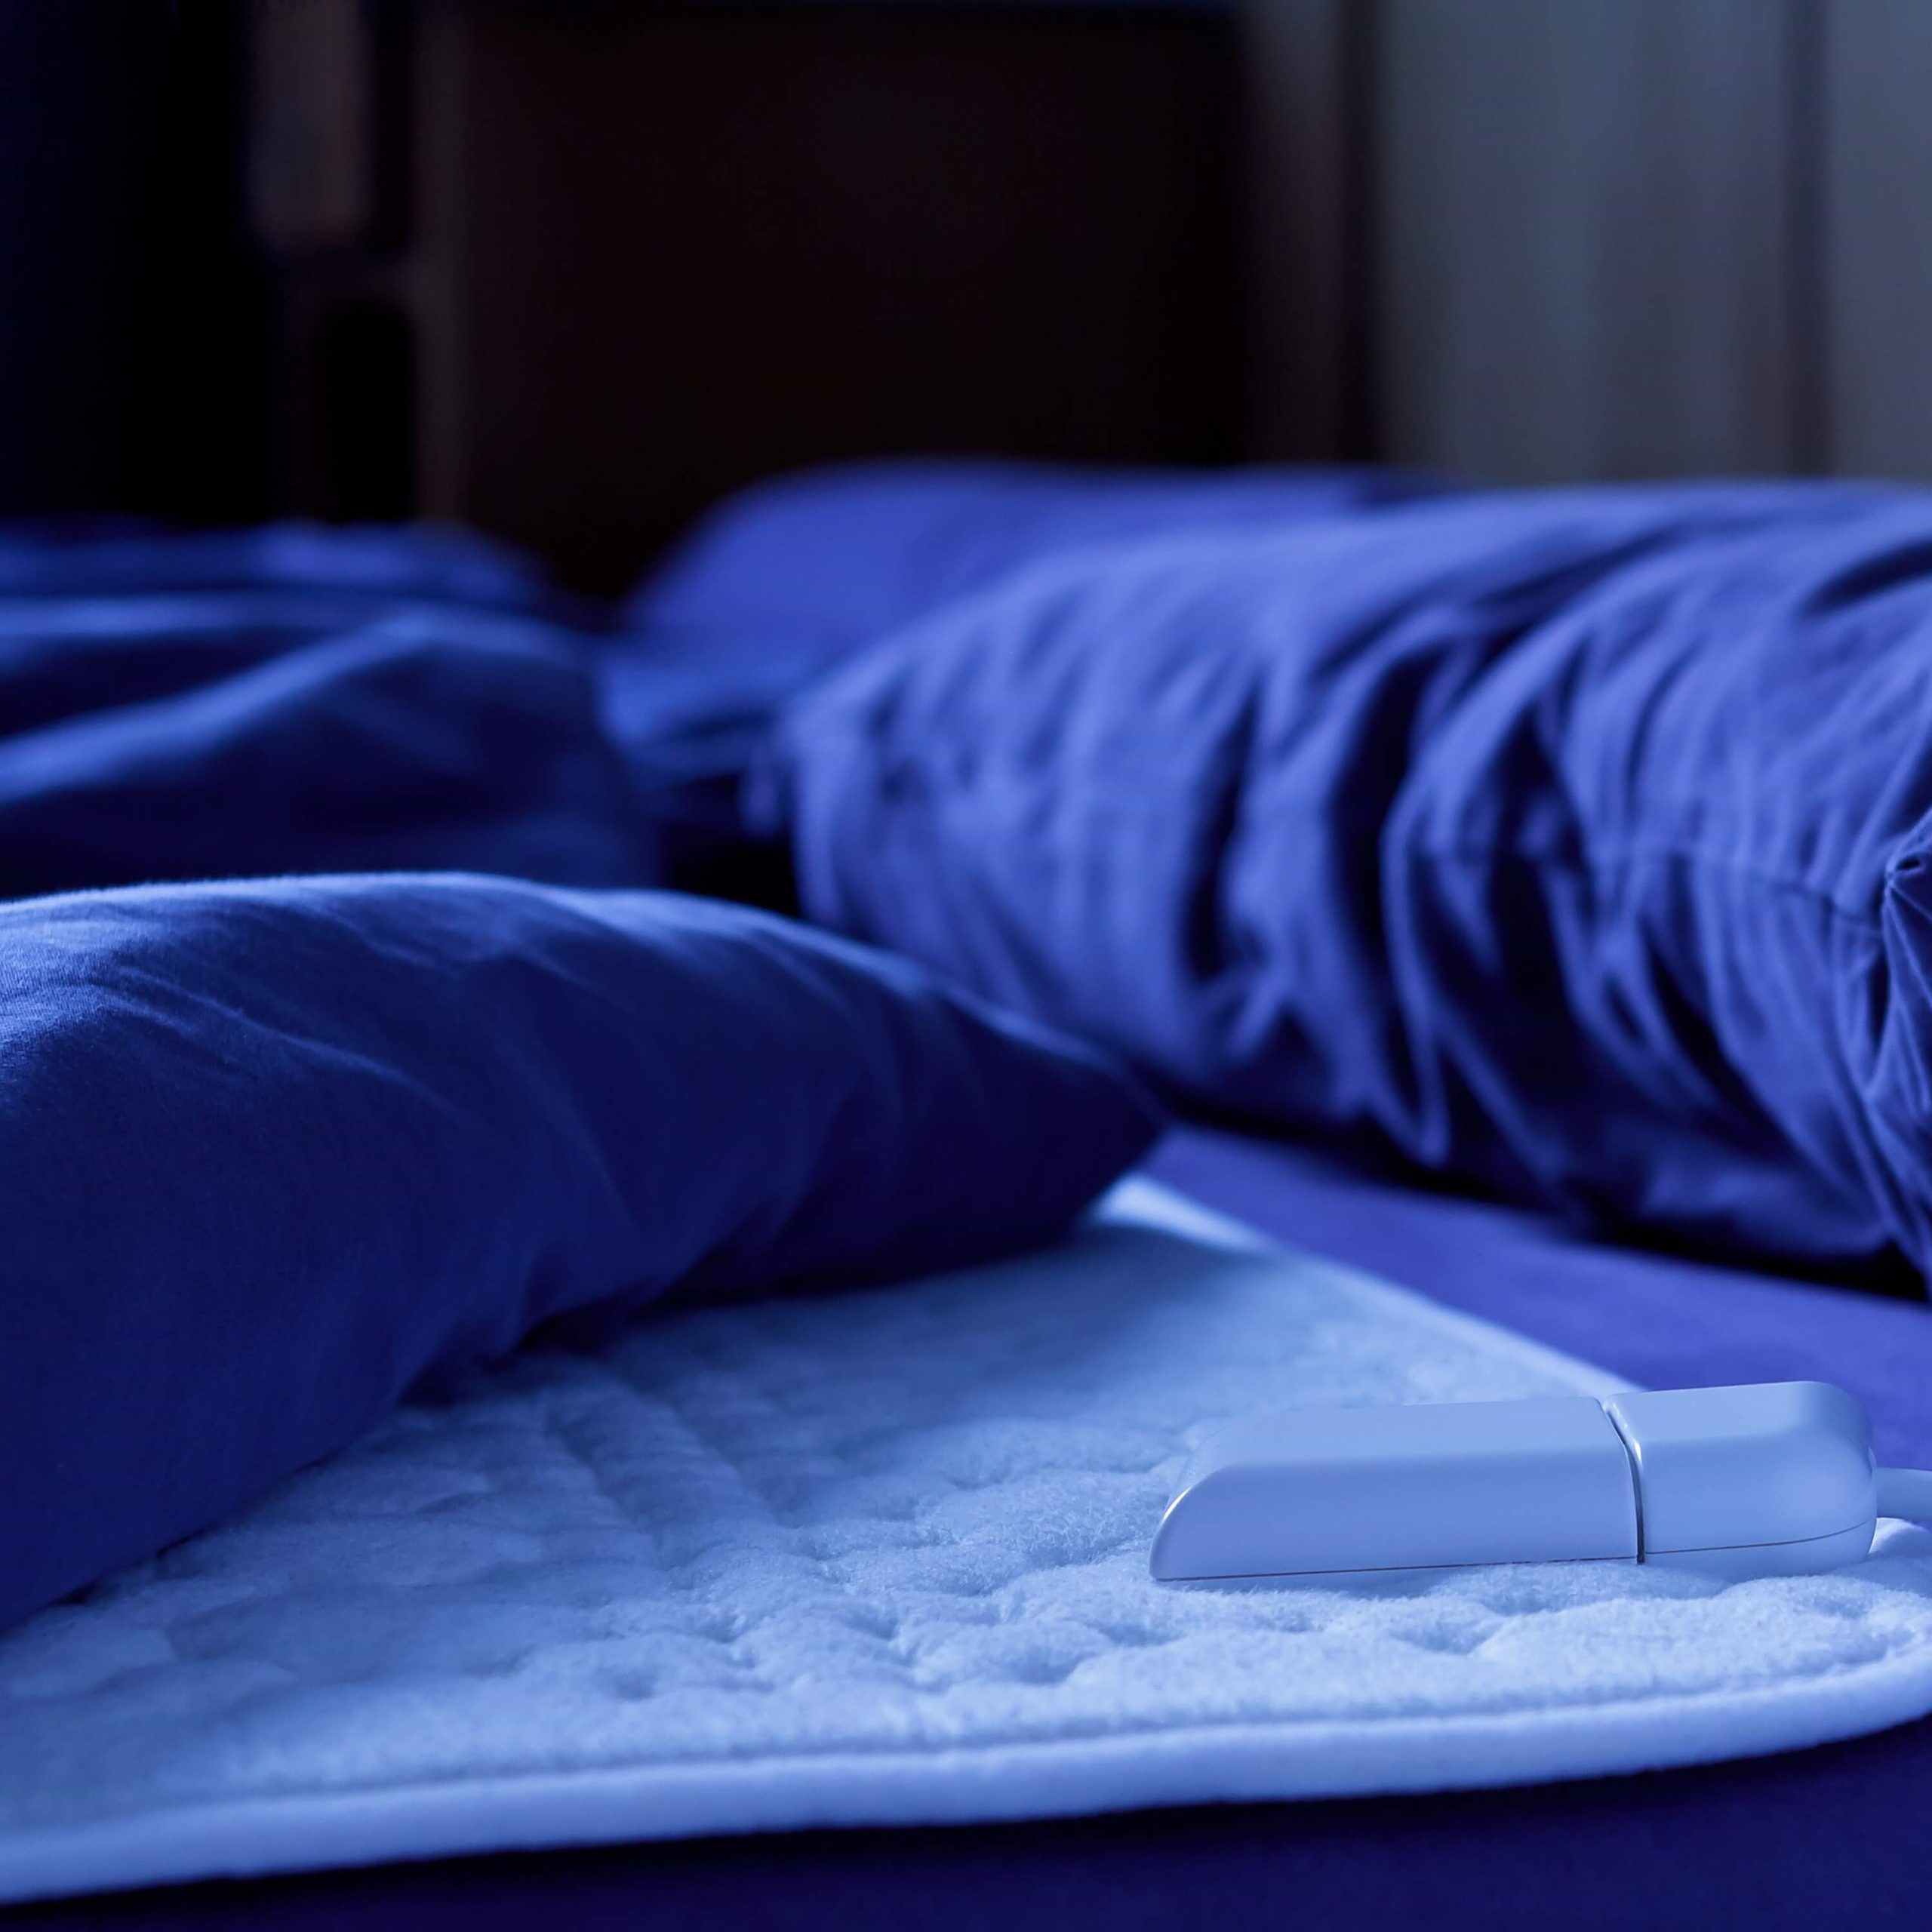
Changing your sleep position can greatly affect the level of comfort for those with a herniated disc. The right sleeping posture can minimize pressure on the herniated disc, thus relieving pain and promoting a good night’s rest. Consider these sleep position modifications:

  • Sleep on Your Back with a Pillow Under Your Knees: This helps maintain the spine’s natural curve and reduces stress on the herniated disc.
  • Side Sleeping with a Pillow Between Knees: Keeps your spine aligned and prevents twisting that can exacerbate herniated disc pain.
  • Avoid Stomach Sleeping: This position can put unnecessary pressure on the spine and worsen your pain.

It’s important to use the correct pillow support to maximize the benefits of these sleeping positions. For instance, a firm pillow will help maintain neck alignment when sleeping on your side.

Not every position works for everyone, so you may need to try different positions to see what works best for you. If you frequently wake up with increased pain, it may be time to reassess your sleeping arrangements or consult with a healthcare professional.

Remember, while adjusting your sleep positions can help alleviate some pain, it should be part of a comprehensive home treatment plan that includes heat and cold therapy, physical activity, and potentially other treatments discussed in this blog. Always listen to your body’s signals and make adjustments as needed.

Over-the-Counter Topical Pain Relievers

When dealing with herniated disc discomfort, topical pain relievers are a practical choice. They deliver quick relief right at the pain’s source. Here’s how to use them effectively:

  1. Choose Topical NSAIDs: Creams such as diclofenac can lessen inflammation, easing nerve pressure.
  2. Apply Counterirritants: Gels like Icy Hot create a sensation that helps distract from the pain.
  3. Follow Instructions: Always read the label for proper usage and dosing guidelines.
  4. Check with a Doctor: Before trying new medications, consult a healthcare professional for advice.

Topical pain relievers can work well when used in conjunction with other remedies, like heat or cold therapy. Combining treatments often leads to better results and can significantly improve your quality of life while managing herniated disc symptoms.

Myofascial Release and Massage Techniques

Relieving pain from a herniated disc can also involve techniques like myofascial release and massage. Let’s explore why these methods can be beneficial and how to apply them safely at home.

  • Myofascial Release: This technique targets tight muscle knots that contribute to your pain.
  • Use a Massage Tool: Simple tools like a foam roller or massage ball apply gentle pressure to the affected area.
  • Apply Steady Pressure: For a minute or two, press steadily on tender spots to loosen the knots.
  • Start Slow: Don’t overdo it. Slow, gradual pressure helps avoid increased pain.
  • Seek Professional Advice: If unsure about techniques, consult with a therapist.

Regular massage can also support myofascial release by reducing muscle tension.

  • Gentle Strokes: Use long, flowing strokes to help calm the nervous system.
  • Focus on Comfort: The massage shouldn’t hurt. Make sure it feels soothing.
  • Combine with Heat: Applying heat before massage can further relax muscles.

Remember, massage and myofascial release are parts of a broader pain management strategy. They work best when paired with other treatments, like heat and cold therapy or physical exercises. Always listen to your body and stop if pain increases.

Hydrotherapy: The Benefits of Epsom Salt Baths

Hydrotherapy, involving water for healing, can be beneficial for herniated disc pain. Epsom salt baths are a form of hydrotherapy. Here’s how they help:

  • Ease Muscle Tension: Warm water can soothe sore muscles and release tension.
  • Reduce Inflammation: Epsom salts, rich in magnesium, may decrease swelling and inflammation.
  • Improve Circulation: The heat helps blood flow, bringing nutrients to aid healing.
  • Promote Relaxation: Bathing in Epsom salts can relax both the mind and the body.

To get the most from an Epsom salt bath, follow these tips:

  1. Fill Your Tub: Use warm water that is comfortable, not too hot.
  2. Add Epsom Salts: Pour in a generous amount of Epsom salts as directed on the package.
  3. Soak for Relief: Remain in the bath for about 15 to 20 minutes.
  4. Hydrate Well: Drink water before and after to stay hydrated.

Remember, while hydrotherapy may provide relief, it should be part of a broader treatment plan. Always consult a healthcare professional before starting any new treatment regimen.

Considering Minimally Invasive Surgery

For some, home remedies may not provide enough relief for herniated disc pain. In these cases, minimally invasive surgery could be an option worth considering. Minimally invasive techniques often result in quicker recovery times and less pain post-surgery compared to traditional open surgery. Here are a few procedures that are typically considered:

  • Laminectomy: This procedure enlarges your spinal canal to ease nerve pressure. The surgeon may remove parts causing nerve compression.
  • Microdiscectomy: Here, a small part of the herniated disc is removed to relieve nerve irritation. It’s a common treatment for sciatic nerve pain stemming from a herniated disc.
  • Spinal Fusion: Sometimes, a stable spine needs help. Fusion joins two vertebrae to reduce movement and pain.

Before considering surgery, it’s key to discuss all the potential risks and benefits with your healthcare provider. They can help determine whether a surgical route is the best course of action for your specific situation.

Remember, combining different treatments often maximizes pain relief. It’s essential to explore all options before making a decision. Surgery is generally viewed as a last resort, only after other treatments haven’t worked. If you suffer from persistent and debilitating herniated disc pain, minimally invasive surgery might help you return to a more active and pain-free life.

herniated disc heating padCombining Treatments for Maximum Relief

To get the best results in relieving herniated disc pain, combining treatments is key. Using a herniated disc heating pad alone may offer temporary comfort, but for lasting relief, one should integrate several approaches.

  • Mix Heat and Cold Therapy: Alternating between a heating pad and ice packs can soothe pain and reduce inflammation.
  • Add Physical Activity: Gentle exercises and stretches can strengthen the back and lower pressure on the disc.
  • Optimize Sleep Positions: A proper sleeping posture can support the spine and lower the strain on the affected area.
  • Use Topical Pain Relievers: For quick, targeted pain relief, apply creams or gels as directed.
  • Try Myofascial Release Techniques: Use self-massage or tools at home to release muscle tension.
  • Incorporate Hydrotherapy: Epsom salt baths may help to relax muscles and ease pain.

For some, surgery might be the best course when other methods haven’t worked. Consulting with a healthcare professional is vital to determine the best treatment plan. It may take time to find what mix works best for you, but combining these treatments has helped many find greater relief from herniated disc pain.

Conclusion: herniated disc heating pad

In summary, navigating life with a herniated disc can be arduous, but utilizing tools such as a herniated disc heating pad can offer significant relief. By understanding how heat therapy operates and implementing it safely, individuals can take proactive steps towards managing their pain effectively. Moreover, combining heat therapy with physical therapy, medications, alternative therapies, and lifestyle adjustments can lead to promising outcomes. Above all, fostering emotional well-being alongside physical treatment is crucial in reclaiming one’s quality of life. Therefore, integrating a herniated disc heating pad into a comprehensive pain management strategy holds the potential for transforming daily experiences, allowing individuals to live life more fully and comfortably.

Home Appliance Personal Care
Is It Safe to Sleep With a Heating Pad?

Risks of Sleeping with Heating Pads

The use of heating pads for sleep comes with clear risks. When asleep, our body’s natural defenses against heat can fail. This can raise chances of skin burns or even severe skin damage. It’s important to be aware of this risk and take proper precautions.

Sleep With a Heating Pad

Burn Hazards and Skin Damage

Extended contact with high heat can harm the skin. Sleeping with a heating pad can cause burns without you even knowing. It’s because the body might not react quickly enough in sleep to the building heat. Always use a heating pad with great care to avoid this danger.

Fire and Electrical Safety Hazards

Heating pads involve electricity. This means there’s a fire risk if they malfunction or overheat. Keeping a heating pad on while sleeping raises this risk. We must be extra cautious and ensure they’re turned off before bed. Don’t place such devices under blankets or near flammable materials either.

Overheating and Disrupted Sleep

Too much warmth from a heating pad can lead to the body overheating. This can be uncomfortable and disrupt sleep quality. Overheating not only affects sleep but can also lead to dehydration and other heat-related problems. Proper usage times and heat settings can help avoid this.

Benefits of Heat Therapy

Pain Relief and Muscle Relaxation

Heat therapy aids in relieving pain and relaxing muscles. When applied, the warmth from a heating pad can ease muscle discomfort and stiffness. This makes it useful for recovery after physical exertion or to alleviate chronic aches. Always start with a lower heat setting and increase as necessary, while ensuring to never fall asleep with the device on.

Improved Blood Flow and Healing

Applying heat improves blood circulation in the targeted area. This increase helps deliver more oxygen and nutrients, speeding up the healing process of tissues. Additionally, the warmth can help flush out harmful substances like lactic acid from muscles, assisting in faster recovery from injuries or intense workouts. It’s important to use the heating pad intermittently—20 minutes on, then at least 20 minutes off—to optimize benefits without overheating.

Reduction of Stress and Tension

Besides its physical benefits, heat therapy also offers relaxation and stress relief. The comfort provided by a heating pad can calm the mind, reduce anxiety, and even help prepare the body for sleep. While it is soothing, remember not to use a heating pad while sleeping. Consider heating the bed shortly before sleep and removing the pad to ensure safety throughout the night.

Safe Usage of Heating Pads

Heating pads provide comfort and pain relief efficiently. However, it is vital to use them safely to avoid any potential risks.

Importance of Using Auto-Shutoff Features

Always opt for heating pads with auto-shutoff features. They turn off automatically after a set time, enhancing safety during use. This feature helps prevent burns and fires, especially if accidentally left unattended.

Appropriate Heat Settings and Time Limits

Do not exceed recommended time limits and heat settings. It is safe to use heating pads in sessions of 20 minutes, followed by at least a 20-minute break. This prevents burns and ensures the skin does not get excessively heated. Start with a lower setting and adjust if needed, but avoid high heat for long periods.

Electrical Safety and Regular Inspection

Check the heating pad regularly for any signs of wear or damage. Look for frayed wires, tears, and any malfunction signs before each use. Promptly replace any damaged or old heating pads to avoid potential hazards like electric shocks or fires. Ensure the pad remains dry and away from any water sources to minimize the risk of electric shock.

Sleep With a Heating PadAlternatives to Overnight Heating Pad Use
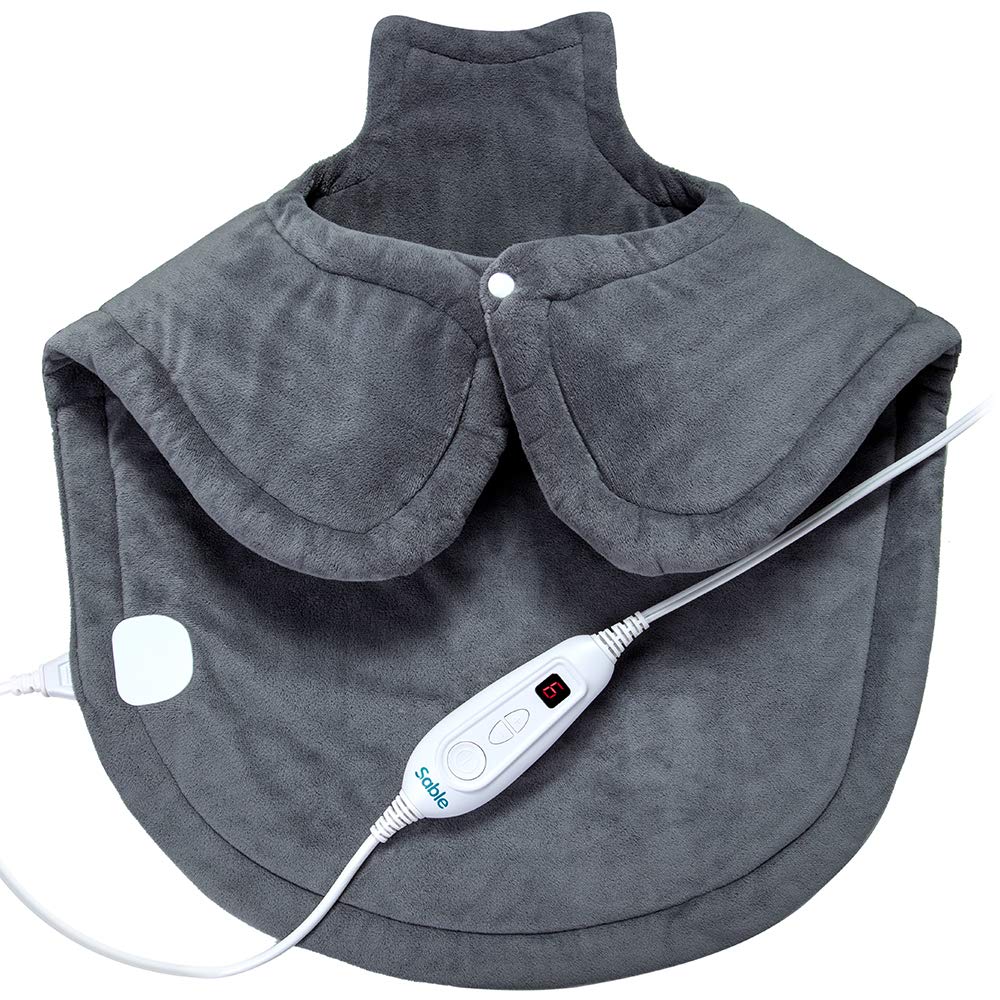
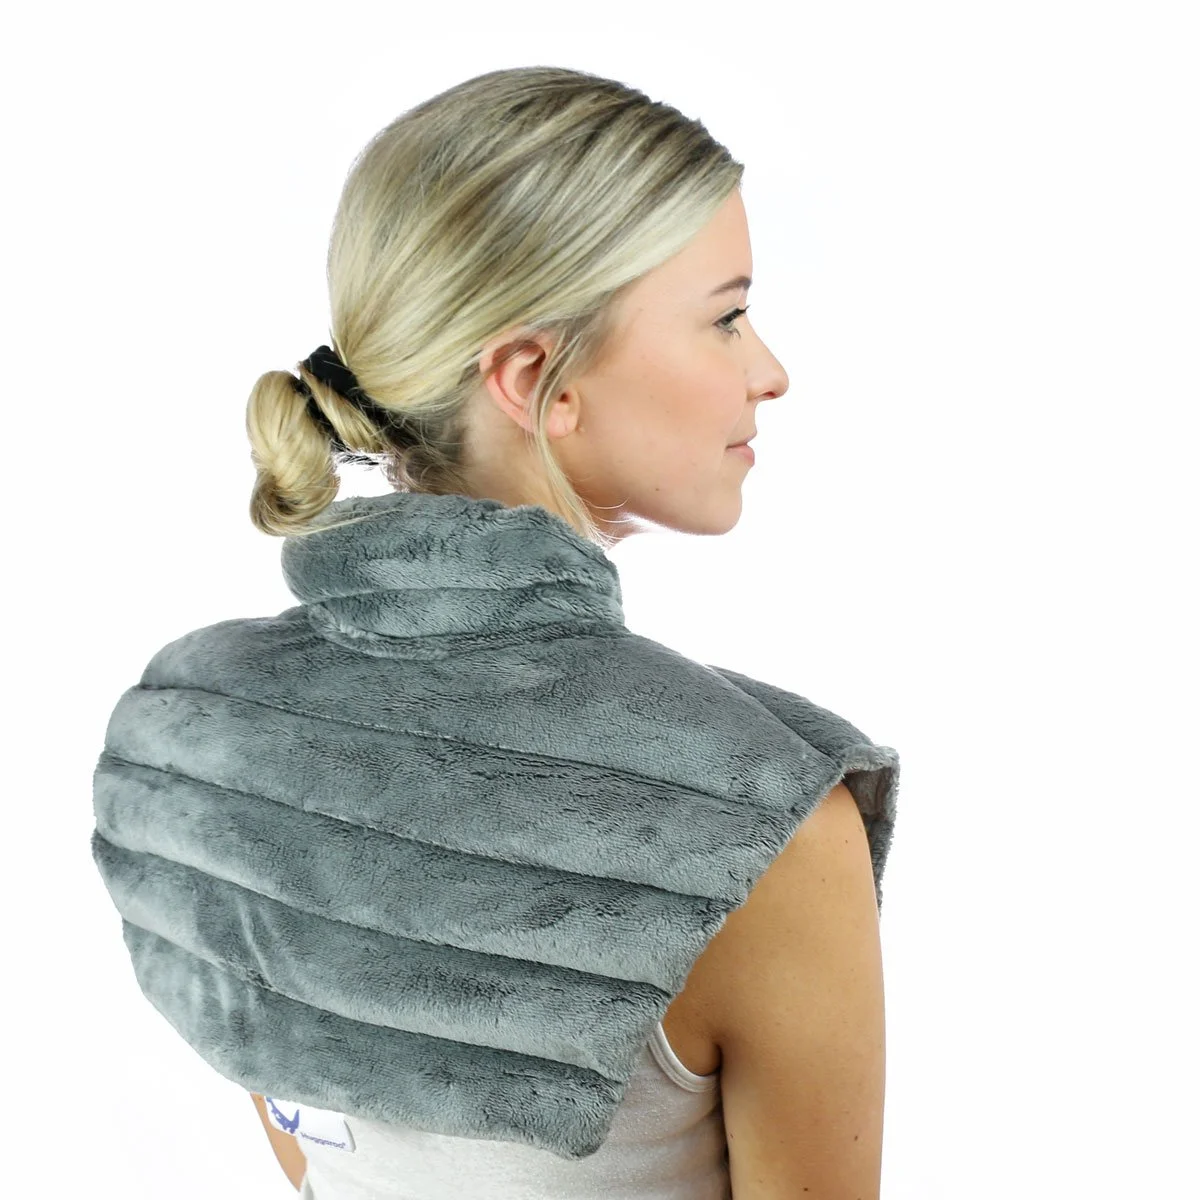
While it’s not safe to sleep with a heating pad, there are safe alternatives for warmth and pain relief throughout the night.

Pre-bedtime Warmth Strategies

Instead of using a heating pad overnight, warm your bed beforehand. Try a hot shower, or use a hot water bottle. Make sure to remove the source of heat before you sleep. Layer blankets to maintain heat without risks.

Wearable Heat Patches and Products

Consider adhesive heat patches for targeted relief. They deliver heat without electricity. Wear them for muscle aches, but follow the time limits specified. These patches are designed for safe, extended use during rest.

Other Forms of Pain Relief and Comfort

Explore non-electric options for relief and comfort. Weighted blankets provide soothing pressure. Foam rollers can release muscle tension. Gentle stretches or yoga before bed may also help relax muscles without any burn risks. Ensure a comfortable sleep temperature in your room to avoid the need for more heat.

Understanding Electricity Consumption

When considering the use of a heating pad, it’s important to evaluate their electricity consumption.

How Much Electricity Do Heating Pads Use?

Heating pads are generally energy efficient. Most devices use between 40 and 100 watts, depending on the model and settings. This makes them relatively economical to operate, especially when compared to larger heating appliances.

Calculating the Cost of Operating a Heating Pad

Understanding the cost involved in using a heating pad can help manage electricity bills. For instance, if a heating pad uses 75 watts and operates for 3 hours daily, the calculation would be as follows:

  • Daily energy use: 75 watts x 3 hours = 225 watt-hours or 0.225 kilowatt-hours.
  • Assuming an electricity cost of 7 per kWh, daily cost is 0.225 kWh x 7 = 1.58.
  • Monthly cost (30 days): 1.58 x 30 = 47.40.

This calculation suggests using a heating pad for three hours daily costs approximately 47 per month, making it an economical choice for pain relief and comfort.

Best Practices for Heating Pad Safety

When using heating pads, safety is paramount. By following best practices, you can enjoy their benefits without undue risks. Here’s how to ensure safe and effective use of heating pads.

Regular Maintenance and Damage Checks

Regularly inspect your heating pad for any signs of wear or damage. Look for frayed wires and tears. Replace any damaged heating pads immediately. Damaged heating pads can be dangerous and may cause injuries or start fires.

Supervised Use Around Children and Pets

Always supervise children and pets when they are near heating pads. Children and pets may not understand the risks. They can accidentally adjust settings or damage the pad. Teach children the proper way to use heating pads and keep them out of pets’ reach.

Recommendations for Safe Heating Pad Usage

Here are several recommendations:

  • Use heating pads with automatic shut-off features to prevent overheating.
  • Set heating pads on low or medium settings to avoid burns.
  • Never leave a heating pad on unattended, especially not while sleeping.
  • Do not place heating pads under blankets or pillows as this can create a fire hazard.
  • Ensure the electric cords are intact and plug directly into outlets, not extension cords.

Using heating pads safely involves regular checks, cautious use, and following specific guidelines to prevent accidents. By adhering to these practices, you can maximize their therapeutic effects while minimizing risks.

Sleep With a Heating PadFinal Thoughts on Sleep Safety with Heating Pads

As we conclude our discussion on the safety of sleeping with heating pads, it’s essential to recap the dangers and preventive measures associated with their use. Sleeping with a heating pad offers undeniable comfort, but the risks often outweigh the benefits, necessitating vigilant attention to safety.

Summarizing Risks and Safety Measures

The primary safety concerns with heating pads include the potential for burns, fire hazards, and overheating. Using a heating pad while asleep makes it difficult to control these risks, as one cannot react swiftly to adjusting temperatures or malfunctions. Heat settings should be managed carefully, and heating pads with auto-shutoff features are recommended to minimize these risks. Ensuring the device is turned off before falling asleep is crucial.

Emphasizing the Importance of Conscious Use

Understanding and respecting the dangers of improper heating pad use are vital for safety. Simple steps such as checking for damage before use, adhering to recommended usage times, and never placing the pad under blankets can significantly enhance safe usage. Conscious and informed application of heating pads ensures both the effectiveness and safety of heat therapy, preserving the benefits while mitigating risks. Always prioritize safety to avoid hazards and ensure a peaceful night’s sleep without complications.

Home Appliance Personal Care
The Comfort of a Weighted Heating Pad for Neck and Shoulders

Benefits of Weighted Heating Pad for Neck and Shoulders Pain

Many people suffer from neck and shoulder pain due to various reasons. Weighted heating pad for neck and shoulders can offer significant relief by combining the soothing power of heat therapy with the added benefit of weight for compression. Let’s delve into how these elements work together to alleviate discomfort.

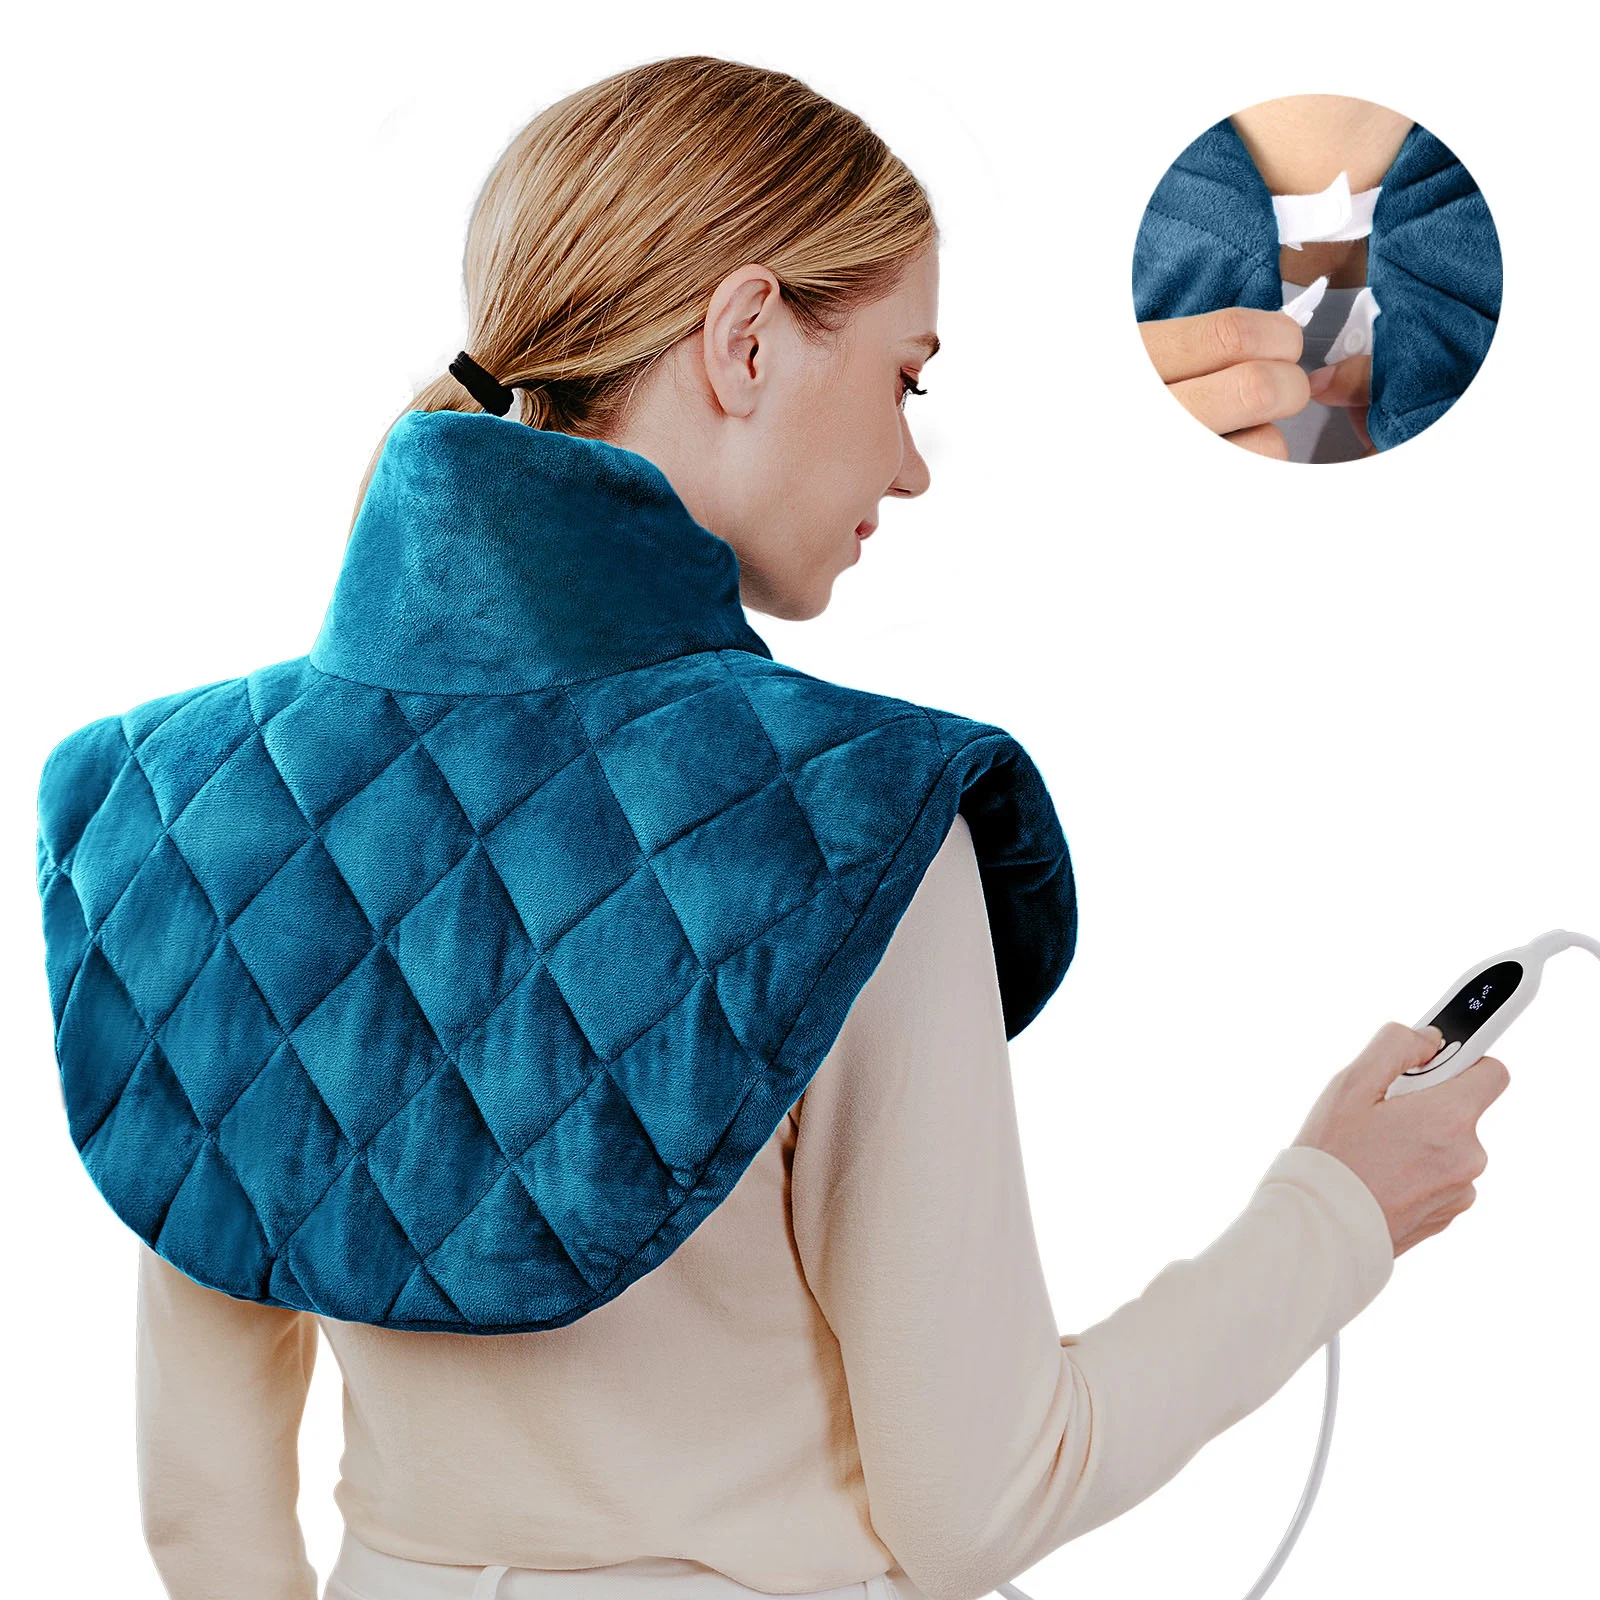
weighted heating pad for neck and shoulders

Heat Therapy for Muscle Relief

Heat therapy is a proven method to alleviate muscle stiffness and pain. Applying heat can increase blood flow to sore areas, bringing much-needed oxygen and nutrients. This process helps relax muscles and reduce the sensation of pain. For those with tight neck and shoulder muscles, heat therapy can be particularly effective.

Added Weight for Improved Compression

The weight on these heating pads does more than keep them in place; it applies gentle pressure that mimics a therapeutic touch. This pressure can help reduce muscle tension, promoting a deeper sense of relaxation. When you combine the warmth with weight, it’s like receiving a warm compress that eases the pain and helps you unwind.

Types of Weighted Heating Pads

Choosing the right type of weighted heating pad depends on your specific pain relief needs and usage preferences. Here, we explore two primary designs that cater to different requirements.

Full-Body Versatility Designs

These weighted heating pads offer flexibility, ideal for those who experience pain in multiple body areas. Shaped like a small blanket, they can be draped over any part of the body. This versatility makes them a practical choice for simultaneous multi-area treatment, such as the back, legs, or arms. Their uniform distribution of weight and heat ensures even pressure and warmth across larger areas, providing a soothing effect overall.

Neck and Shoulder Contoured Pads

Specifically designed to target the neck and shoulder regions, these pads contour around your upper spine and shoulder blades. They provide localized treatment, which is optimal for individuals suffering from chronic neck and shoulder tension. The ergonomic design focuses heat and pressure exactly where it is needed, promoting faster relief and recovery. This type of pad often comes with features like adjustable straps or magnetic clasps to ensure it stays in place, even while you’re seated or moving around the house.

weighted heating pad for neck and shouldersKey Features of Effective Weighted Heating Pads
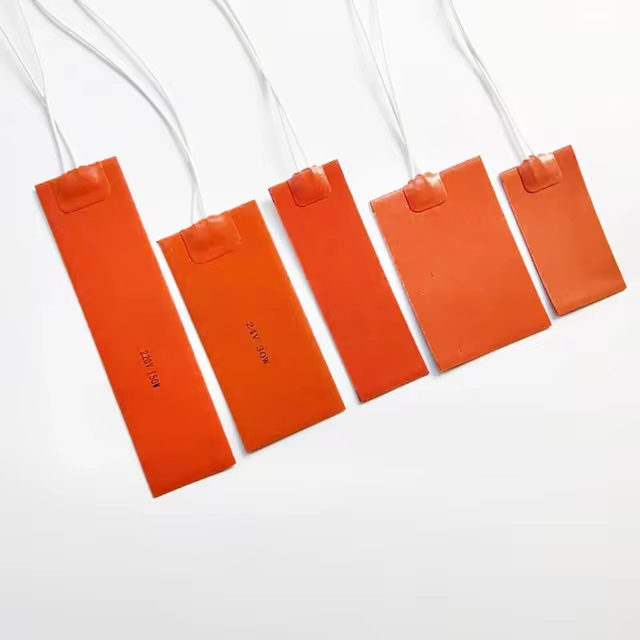
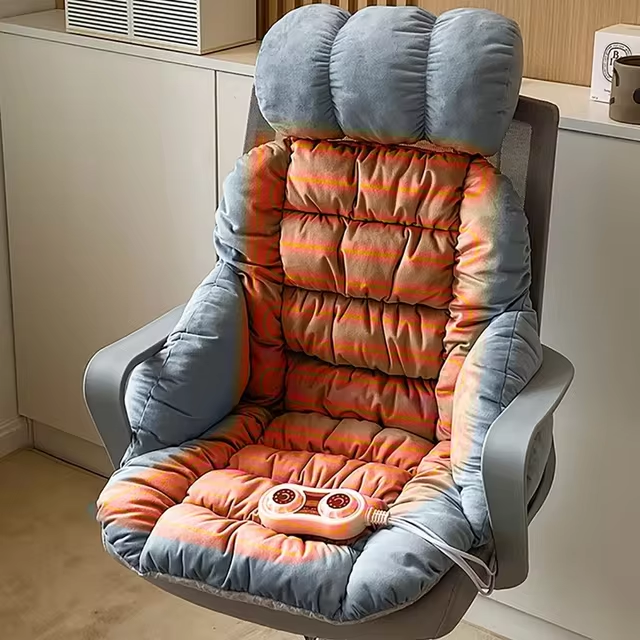
When seeking relief from neck and shoulder pain, weighted heating pads are a go-to solution. To ensure you get the most effective pad, consider these key features:

Temperature Control Options

Look for pads with adjustable heat settings. This allows for a heat level comfortable for you, and suitable for varying pain intensities. Some offer low, medium, and high settings, giving you control and flexibility.

Machine-Washable Covers

Hygiene is vital for products used frequently. Machine-washable covers make it easy to keep your weighted heating pad clean. This feature is particularly important if you use creams or oils that could soil the pad.

Built-in Massage Functions

Some weighted heating pads come with additional massage options. These can enhance pain relief by combining heat with therapeutic vibrations. A pad with both heat and massage functions can provide a deeper sense of relief.

Top Picks for Weighted Heating Pads

Choosing the right weighted heating pad can greatly enhance your comfort and pain relief. Here are our top picks based on effectiveness, user feedback, and additional features.

Best Overall Weighted Heating Pad

The Sharper Image Calming Heat Massaging Weighted Heating Pad stands out as the best overall option. It covers your entire back and neck, providing heat and massage settings to suit various preferences. It is ideal for those seeking extensive coverage and therapeutic benefits when dealing with pain.

Best for Back Pain

For back pain relief, the Renpho Large Heating Pad for Back Relief is our top choice. Its unique contour and lightweight design make it easy to use while seated or relaxing. The pad’s high temperature and washable cover add convenience and effectiveness, making it ideal for routine use.

Best for Neck and Shoulder Pain

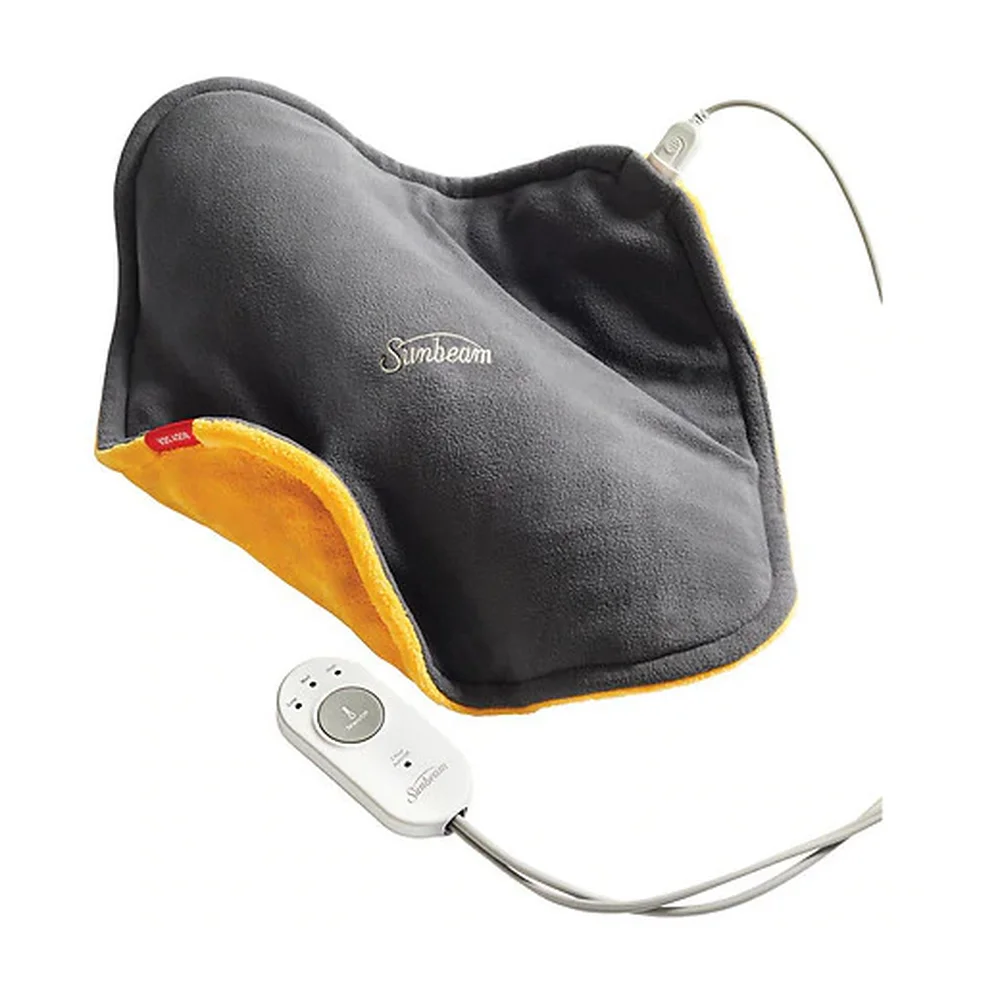
The Sunbeam Heating Pad for Neck and Shoulder Pain Relief is specifically designed for those areas. Its ergonomic shape fits snugly around the neck and shoulders, providing targeted heat that can be adjusted between dry and moist settings. The automatic shutoff feature enhances safety, making it a reliable choice for overnight use or relaxation time.

How to Choose the Right Weighted Heating Pad

Choosing the right weighted heating pad can be key to your comfort and relief. It’s important to get one that will suit your particular needs. Let’s consider how to pick the best one for you.

Assessing Your Specific Needs

Think about where you’ll use the weighted heating pad the most. If neck and shoulder pain is your main concern, look for a pad specifically designed for that area. Contoured pads can target this pain effectively. If you need a versatile option for different body parts, go for a full-body design. Consider your lifestyle too. Do you need a pad that’s portable or one for longer sessions at home?

Safety and Material Considerations

Safety should be top of mind. Choose a pad with an automatic shutoff feature to prevent overheating. Verify if the materials are non-toxic and BPA-free, especially if you have sensitive skin or allergies. The cover should be comfortable and preferably made of a durable, washable fabric. Check for FDA approval or a good track record with no recalls or warnings as well.

By considering your specific needs and safety material, you will be well on your way to finding the perfect weighted heating pad. Remember, the goal is to achieve both safety and comfort.

weighted heating pad for neck and shouldersShopping Considerations

When you’re in the market for a weighted heating pad for neck and shoulders, it’s not just about picking any product. You should consider the price, warranty, consumer reviews, and the brand’s reputation. Here’s a brief guide to making an informed decision.

Price Points and Warranty Options

Weighted heating pads come with varying price tags. More features often mean a higher cost. Look for a pad that fits your budget while offering the best value. Some pads are under $40, while others can cost over $55. Remember, a higher price doesn’t always guarantee better quality. Warranties are crucial as they give you a safety net. A product with a long warranty period shows that the company stands behind its quality. Be on the lookout for pads offering extended warranty options; they can save you money in the long run.

Consumer Reviews and Brand Reputation

Before making a purchase, check online reviews. Sites like Amazon and Trustpilot often have thousands of user testimonials. These reviews can reveal a lot about a product’s performance and durability. Pay attention to comments about comfort, heating effectiveness, and customer service experiences. Additionally, research the brand’s reputation. Ensure the company has not been involved in recalls or lawsuits. Check if they are FDA approved or accredited by organizations like the Better Business Bureau (BBB). A good brand reputation often translates to reliable and safe products.

Final Thoughts

In summary, a weighted heating pad for neck and shoulders is an innovative, effective tool for relieving pain, easing muscle tension, and promoting relaxation and better sleep. By understanding its features, searching for quality materials, and using it correctly, you can maximize its benefits. Whether you are dealing with chronic pain or simply trying to unwind after a long day, incorporating a weighted heating pad into your self-care routine can significantly enhance your overall well-being. Investing in this simple yet powerful tool may lead to improved comfort and a better quality of life.

Home Appliance Personal Care
Is a Heat Pad Safe for Pregnancy Discomfort?

Pregnancy is a beautiful journey filled with anticipation and joy, but it can also come with its fair share of discomforts. Many expectant mothers experience back pain, abdominal cramps, and other bodily aches as their bodies undergo significant changes. In such instances, a common question arises: is using a heating pad safe during pregnancy? This article will address that question while also exploring the risks, benefits, and considerations associated with the use of heating pads during this critical period.

heating pad

Understanding the Different Types of Heating Pads

When considering the safety of heating pads during pregnancy, it’s essential to first understand the different types available on the market today. Primarily, there are electric heating pads and microwaveable heat packs. Each type has its specific use, benefits, and potential risks.

Electric Heating Pads

Electric heating pads provide continuous heat and can be adjusted to various temperature settings. Although they are convenient, their use during pregnancy comes with specific cautions. Since electric pads require a power source, there is a risk of overheating, which can lead to burns, especially if the pad is left on for an extended period.

Moreover, some sources warn that prolonged use of electric heating pads may raise the body temperature to levels that are not advisable during pregnancy. Elevated body temperature, particularly in the first trimester, has been linked to certain birth defects. Therefore, it is crucial for pregnant women to exercise caution when using electric heating pads.

Microwaveable Heat Packs

Microwaveable heat packs are filled with materials that retain heat, such as rice or gel. They can be heated in the microwave and usually come with fewer risks than electric heating pads. However, it’s still vital to monitor the temperature and ensure that they don’t become excessively hot before use. Overheating a microwaveable pack can lead to burns or discomfort.

To summarize, both types of heating pads have their pros and cons, and careful consideration is needed before deciding which one to use, especially during pregnancy.

Potential Benefits of Using a Heating Pad During Pregnancy

Despite the precautions, there are several benefits to using heating pads during pregnancy. Many women find relief from aches and pains, making this a valuable tool during this time of change.

Alleviating Lower Back Pain

Lower back pain is remarkably common during pregnancy, often stemming from the growing weight of the baby and alterations in the body’s center of gravity. Applying heat to the lower back can stimulate blood flow and reduce muscle tension. However, it is recommended to use heat for short periods, ideally 15 to 20 minutes at a time, to avoid overheating the skin.

Easing Abdominal Cramps

Some women experience abdominal cramps, particularly in the first trimester. While the cause can range from implantation cramps to stretching of the ligaments, mild heat can provide comfort. The soothing warmth of a heating pad can alleviate discomfort, but it is crucial to avoid placing it directly on the abdomen for extended periods.

Enhancing Overall Relaxation

Pregnancy can bring about an array of physical and emotional stressors. Using a heating pad can induce relaxation, helping to create a more serene atmosphere. While this relaxation can be beneficial, it is essential to maintain moderation to prevent overheating.

heating pad

Risks Associated with Heating Pads During Pregnancy

While there are benefits to using heating pads, it is equally important to be aware of the associated risks. Understanding these risks can empower expectant mothers to make informed decisions about their health and well-being.

Potential Overheating

One of the most significant risks of using heating pads during pregnancy is the possibility of overheating. When the body temperature exceeds 102.5°F (39.2°C), it can lead to complications. Therefore, if you choose to use a heating pad, frequently check the temperature and limit usage to reduce the risk of overheating.

Skin Burns

Skin sensitivity increases during pregnancy. Consequently, using heating pads, especially electric ones, for long durations can result in burns. It’s recommended to place a cloth between the heating pad and your skin to reduce this risk, thereby incorporating an extra layer of protection.

Medical Conditions

Certain medical conditions may further complicate the use of heating pads. For instance, women with conditions such as gestational diabetes need to be particularly mindful of their body temperature. Elevated body temperature can affect blood sugar regulation, presenting a risk to both the mother and baby.

In this instance, consulting with a healthcare provider is vital. Your healthcare professional can provide personalized advice based on your specific condition.

Recommendations for Safe Use of Heating Pads During Pregnancy

When it comes to using a heating pad during pregnancy, moderation and mindfulness are essential. To ensure safety while still reaping the benefits, consider the following recommendations.

Consult with Your Healthcare Provider

Before using a heating pad, always discuss your intentions with your healthcare provider. They can offer tailored guidance based on your particular situation and medical history. Some practitioners may even suggest alternative methods for pain relief during pregnancy.

Limit Use and Duration

As a general rule, limit the application of heat to about 15-20 minutes at a time and avoid using heating pads directly on the abdomen. This approach minimizes the risk of overheating while still providing some level of comfort.

Monitor Temperature

Keep a close eye on the temperature settings if you are using an electric heating pad. Opt for the lowest setting that still provides relief. For microwaveable packs, ensure you let it cool for a moment before applying it to your skin.

Use a Barrier

Whether you choose an electric heating pad or a microwaveable pack, it’s always wise to use a barrier, such as a towel or cloth, between the heating source and your skin. This barrier can help prevent burns and discomfort.

Listen to Your Body

Every pregnancy is different, and what works for one person may not work for another. It’s crucial to listen to your body. If any discomfort or unusual sensations arise while using a heating pad, it is best to stop using it and consult your healthcare provider.

Alternative Methods for Pain Relief During Pregnancy

While heating pads can provide relief, there are alternative methods that may also help alleviate discomfort during pregnancy. Exploring these options can help create a comprehensive strategy for managing pain and discomfort.

Prenatal Massage

Prenatal massage is a safe and effective method for relieving tension and pain in the muscles and joints during pregnancy. Trained professionals know how to work gently around sensitive areas and can provide relief that complements or even replaces the need for heat therapy.

Gentle Stretching and Yoga

Participating in gentle stretching exercises or yoga specifically designed for pregnant women can improve flexibility and reduce pain. Engaging in these active methods encourages both physical and mental well-being, thus benefiting the mother and the baby.

Warm Baths

Instead of heating pads, opt for warm baths, which can provide the same soothing benefits. Fill a tub with warm water, but ensure the temperature is not too hot. This strategy can help relax sore muscles and reduce tension without the risks associated with direct heat application.

Hydrotherapy

Hydrotherapy, which involves the use of water for pain relief, can be helpful during pregnancy. Whether it’s a warm shower, bath, or even a swim in a pool, being in water can provide buoyancy and relieve pressure on the joints, offering a soothing experience.

heating padConclusion: Is Heating Pad Safe During Pregnancy?

In summary, the question of whether heating pads are safe during pregnancy does not have a definitive yes or no answer. Women can benefit from the use of heating pads to alleviate discomfort, yet they must be aware of the potential risks involved. By taking the necessary precautions—such as consulting healthcare providers, adhering to time limits, and monitoring temperatures—expectant mothers can safely incorporate heating pads into their self-care routines. It ultimately comes down to individual circumstances and personal preferences. Therefore, it is crucial to weigh the benefits against the risks to make an informed decision.

Home Appliance Personal Care
The Marvel of Automatic Curling Iron: Elevating Your Hair Game

Introduction:

Automatic curling irons have revolutionized the way we style our hair, offering convenience and innovative technology combined into one sleek device. With just the touch of a button, these tools can transform your hair from flat and lifeless to voluminous and glamorous in mere minutes. This article delves into the mechanics, benefits, and best practices surrounding automatic curling irons, aiming to equip you with the knowledge needed to master this hair styling marvel.

Understanding Automatic Curling Irons

What Is an Automatic Curling Iron?

An automatic curling iron is a hair styling tool designed to curl hair quickly and efficiently. Unlike traditional curling irons, which require a fair amount of skill and practice, automatic models utilize advanced technology to create curls with minimal effort. Simply feed sections of hair into the device, and it does the rest, curling your hair uniformly, whether you desire beachy waves or defined ringlets.

How Do They Function?

To comprehend the appeal of automatic curling irons, it is essential to understand their inner workings. Most models feature a heated chamber that automatically draws in hair. Once inside, the device wraps the hair around a heated barrel to create curls. After a brief waiting period, the curling iron beeps to indicate that the curl is complete. Transitioning from a straight to a curly look has never been easier!

Key Features to Look For

When choosing an automatic curling iron, several features stand out. First, consider the barrel size. If you wish to create loose curls, a larger barrel (1.5 inches or more) is ideal. In contrast, a smaller barrel (1 inch) is better suited for tighter, more defined curls.

Another important feature is heat settings. High-quality curling irons offer multiple temperature settings to cater to different hair types. For instance, fine or damaged hair can benefit from lower temperatures, while thicker or coarse hair may require higher heat settings.

Additionally, look for safety features such as an automatic shut-off, which ensures that the device turns off after a certain period of inactivity, reducing risks of burns or fire hazards. Furthermore, models with curl direction control allow you to customize the direction of your curls, favoring a more natural look.

automatic curling iron

The Advantages of Using an Automatic Curling Iron

Time Efficiency

One of the most notable advantages of using an automatic curling iron is the time it saves. Those busy mornings can often lead to rushed hair-styling rituals. An automatic iron simplifies the process, reducing the time spent on curling from nearly an hour to mere minutes. With the hustle and bustle of daily life, who wouldn’t appreciate a tool that provides professional-level curls in such a short time?

Consistent Results

For many, achieving consistent curls can be a daunting challenge when using a conventional curling iron. However, automatic curling irons often deliver uniform results. The device wraps hair at the same angle and tension each time, leading to beautifully consistent curls that look salon-fresh. This reliability can boost your confidence and cut down on the frustration that may accompany traditional curling methods.

User-Friendly Design

Automatic curling irons are inherently user-friendly, making them an excellent choice for styling novices. The intuitive design typically incorporates a digital display, beep alerts for completion, and an easy-to-hold grip that minimizes wrist strain. Regardless of your styling experience, the learning curve is almost nonexistent, as these devices guide you through the process seamlessly.

Versatility in Styles

Whether you desire soft waves for a casual outing or tight curls for an elegant evening event, automatic curling irons offer flexibility. You can experiment with varied styles by adjusting heat settings, barrel sizes, and curl directions. This versatility means that you can express your individuality and creativity, allowing for an ever-changing hairstyle that matches your mood or occasion.

automatic curling iron

Using Your Automatic Curling Iron: A Step-by-Step Guide

Preparing Your Hair

Before diving into styling, it is essential to prepare your hair. Start with clean, dry hair, as damp hair can result in uneven styling or damage. Apply a heat protectant spray to shield your hair from potential heat damage while promoting shine and longevity.

Once you’re set up, section your hair into manageable parts. This helps you achieve a more polished look, as smaller sections allow the curling iron to work effectively.

Curling Process

Begin by turning on your automatic curling iron and choosing your desired temperature. Once it reaches the appropriate level, pick up a section of hair no wider than the barrel size, ensuring that it isn’t too thick or it may not curl properly.

Next, place the hair into the curling chamber. Make sure you follow the instructions regarding the curl direction; typically, pressing the left button curls to the left and the right button curls to the right. Once the hair is inserted into the chamber, the device will automatically pull the hair in.

Waiting for the Beep

Patience is key during this step. Many automatic curling irons are designed to beep when the curl is ready, usually after a few seconds. It’s important not to panic and pull the hair out too soon, as this could lead to loss of curl structure.

Release & Style

After you hear the beep indicating the curl is completed, gently pull the handle to release the curl. Avoid tugging, as this can damage the hair. Once you’ve curled your entire head, allow the curls to cool for a few minutes. This additional cooling period helps locks in the curl’s shape, improving the longevity of your hairstyle.

Finishing Touches

Once all your curls have set, finish with a light-hold hairspray to keep them in place without feeling stiff or crunchy. You may also choose to lightly tousle the curls with your fingers for a more relaxed, lived-in look. Incorporating these finishing touches enhances your hairstyle, giving it an effortless appearance.

Troubleshooting Common Issues

Curl Not Forming Properly

If you find that your curls aren’t forming correctly, several factors might be at play. First, ensure that you are using sections of hair that are appropriate for the barrel size of your curling iron. If the sections are too wide, it can lead to flat curls or none at all.

Another reason may be that your hair isn’t completely dry. Always make sure to start with dry hair. Furthermore, ensure your heat setting is appropriate for your hair type. If your hair is particularly thick, it might need a higher setting to achieve curls effectively.

Curls Falling Flat

After working hard to achieve beautiful curls, it can be disheartening when they fall flat. This often occurs due to insufficient heat or not allowing the curls to cool down. To combat this, try increasing the heat setting slightly or ensure your curls cool in place before moving them.

Additionally, using a strong-hold hairspray can offer added support to those curls. Experimenting with different products can be beneficial in finding what works best for your specific hair type.

automatic curling ironConclusion: Embrace the Revolution of Automatic Curling Irons

Automatic curling irons are a game-changer in the world of hair styling, providing convenience, consistency, and ease of use. As you explore the options available, consider the features that best suit your hair type and styling needs. The user-friendly design and innovative technology can significantly cut down styling time, allowing you to enjoy more moments rather than spending them on painstaking hair routines.

Whether you are preparing for a busy day or a glamorous night out, an automatic curling iron can help you achieve beautiful results with minimal effort. As you embrace this new and exciting hair tool, you’ll find that looking great is now just a quick twist, beep, and fluff away!

Home Appliance Personal Care
Unlocking the Secrets of the Rotating Curling Iron

In the ever-evolving world of hairstyling tools, the rotating curling iron has emerged as a game-changer. Combining innovation with functionality, this device promises to deliver effortless, salon-quality curls with minimal effort. Whether you’re a seasoned stylist or someone who tackles hair routines solo, understanding the benefits and usage of a rotating curling iron can transform your everyday styling experience. This comprehensive guide delves into everything you need to know about these innovative tools, from their design and features to tips for achieving the perfect curl every time.

rotating curling iron

Understanding the Rotating Curling Iron

What Sets Rotating Curling Irons Apart

Rotating curling irons differ significantly from traditional curling tools. Unlike static irons that require manual wrapping and holding, rotating models automate the curling process. This feature not only saves time but also ensures consistent results with less manual effort. Furthermore, the technology behind the rotation often allows for adjustable settings, catering to various hair types and desired curl intensities.

The Technology Behind the Rotation

At the heart of the rotating curling iron lies sophisticated motor technology. This motor controls the speed and direction of the barrel’s rotation, enabling seamless curls without the need for constant hand movement. Additionally, many models incorporate advanced temperature control systems, allowing users to adjust heat levels according to their hair’s thickness and texture. This precise control minimizes heat damage, promoting healthier hair with each use.

Key Features to Consider

Barrel Size and Shape

One of the most critical aspects when choosing a rotating curling iron is the barrel size. Larger barrels produce loose, beachy waves, while smaller barrels create tighter, more defined curls. Additionally, the shape of the barrel—be it classic, tapered, or triple-sectioned—can influence the final look. It’s essential to select a size and shape that aligns with your preferred hairstyle and hair type.

Adjustable Heat Settings

Temperature control is paramount in achieving beautiful curls without compromising hair health. Rotating curling irons typically offer a range of heat settings, allowing for customization based on hair thickness and desired curl tightness. Lower temperatures are ideal for fine or damaged hair, while higher settings cater to thick or coarse textures. Ensuring that your curling iron has precise heat adjustments can make a significant difference in both styling efficiency and hair health.

Automatic Shut-Off and Safety Features

Safety should never be an afterthought when selecting a curling tool. Many rotating curling irons come equipped with automatic shut-off features that activate after a set period of inactivity. This not only prevents accidents but also extends the device’s lifespan. Additionally, features like heat-resistant handles and cord storage contribute to safer and more convenient usage.

Benefits of Using a Rotating Curling Iron

Time Efficiency

One of the most significant advantages of using a rotating curling iron is the time saved during the styling process. The automated rotation eliminates the need for manual wrapping and rolling, allowing users to achieve professional-looking curls in a fraction of the time. This efficiency is particularly beneficial for those with busy schedules or anyone seeking a quick hairstyling solution.

Consistent Results

Achieving uniform curls can be challenging with traditional curling irons, especially for those who are not professional stylists. Rotating curling irons offer consistent rotation speed and angle, ensuring that each curl is uniform in size and shape. This consistency not only enhances the overall appearance of your hairstyle but also simplifies the styling process, making it easier to replicate desired looks.

Reduced Heat Damage

Excessive heat is a common culprit behind damaged hair, leading to dryness, breakage, and split ends. Rotating curling irons often feature advanced heat control technologies that distribute heat more evenly and prevent hotspots. By maintaining optimal temperatures personalized to your hair type, these tools minimize potential damage, promoting healthier, shinier hair over time.

How to Use a Rotating Curling Iron

Preparing Your Hair

Before using a rotating curling iron, it’s essential to prepare your hair properly. Start by washing and thoroughly drying your hair, as damp hair can lead to uneven curls and increased heat damage. Applying a heat protectant spray is also recommended to create a barrier between your hair and the device, safeguarding against potential heat-related harm.

Sectioning Your Hair

To achieve optimal results, it’s advisable to section your hair before styling. Divide your hair into manageable sections using clips or hair ties. This approach ensures that each strand is evenly exposed to the curling iron, resulting in uniform curls. Working with smaller sections can also enhance the overall volume and texture of your hairstyle.

Curling Technique

Once your hair is sectioned, it’s time to use the rotating curling iron. Start by selecting the appropriate heat setting for your hair type. Then, take a small section of hair and clamp it between the curling iron’s barrel and your palm. Activate the rotation function, allowing the device to automatically curl your hair. Hold each section in place for a few seconds, depending on the desired curl tightness, before releasing. Continue this process until all sections are curled, adjusting settings as needed for different hair areas.

Finishing Touches

After curling, allow your hair to cool completely to set the curls. Once cooled, gently run your fingers through the curls to achieve a more natural, tousled look, or use a wide-tooth comb for a sleeker finish. Applying a light-hold hairspray can help maintain the curls’ shape and longevity, ensuring your hairstyle stays fresh throughout the day.

Maintenance and Care

Cleaning the Barrel

Proper maintenance of your rotating curling iron ensures its longevity and performance. Regularly clean the barrel to remove any product buildup or residue that can affect the device’s functionality. Use a soft, damp cloth to wipe the barrel after each use, avoiding abrasive materials that might damage the surface.

Storing Your Curling Iron

Storing your curling iron correctly prolongs its lifespan and ensures safety. Allow the device to cool completely before storing it in a heat-resistant holder or pouch. Avoid wrapping the cord tightly around the barrel, as this can cause tangling or damage to the wiring. Instead, use a cord wrap or clip to keep the cord neat and accessible.

Routine Maintenance Checks

Periodically inspect your rotating curling iron for any signs of wear or damage. Check the cord for fraying, ensure the temperature controls are functioning correctly, and verify that the rotating mechanism operates smoothly. Addressing minor issues early can prevent more significant problems and maintain the device’s efficiency.

rotating curling iron

Comparing Rotating Curling Irons to Traditional Models

Efficiency and Ease of Use

While traditional curling irons require manual effort to achieve each curl, rotating models automate much of the process. This automation not only speeds up styling but also reduces the physical strain associated with manual curling. Consequently, users can achieve professional-grade curls with less effort and greater convenience.

Consistency and Versatility

Rotating curling irons excel in producing consistent curls, a feat that can be challenging with traditional tools. The automated rotation ensures uniformity in size and shape, which is particularly beneficial for individuals seeking a polished and cohesive hairstyle. Additionally, many rotating models offer adjustable settings that cater to various hair types and styling preferences, enhancing their versatility.

Cost and Value

While rotating curling irons may come with a higher initial price tag compared to traditional models, their efficiency and advanced features offer significant value over time. Users can save time and effort during daily styling routines, and the enhanced hair health benefits contribute to overall hair maintenance costs. Thus, the investment in a rotating curling iron can be justified by the long-term advantages it provides.

Tips for Achieving Perfect Curls

Selecting the Right Temperature

Choosing the appropriate temperature is crucial for both achieving the desired curl and maintaining hair health. Fine or damaged hair benefits from lower heat settings, which prevent unnecessary stress and breakage. Conversely, thick or coarse hair types may require higher temperatures to create lasting curls. Always start with a lower setting and gradually increase if needed to avoid overexposure to heat.

Using Quality Hair Products

Integrating quality hair products into your styling routine can enhance the performance of your rotating curling iron. Heat protectants shield your hair from potential damage, while volumizing sprays and mousse can add body and texture, making your curls appear fuller and more dynamic. Additionally, setting products like hairspray or serum can help maintain the curls’ shape and reduce frizz.

Practicing Patience and Technique

Mastering the use of a rotating curling iron requires patience and practice. Take the time to experiment with different settings and techniques to discover what works best for your hair type and desired style. Consistent practice will help you develop a reliable method, ensuring that you can achieve perfect curls with ease and confidence.

Troubleshooting Common Issues

Uneven Curls

Uneven curls can result from inconsistent sectioning or improper heat distribution. Ensure that your hair is evenly divided into sections and that each strand is thoroughly wrapped around the curling iron. Additionally, verify that the device’s temperature settings are appropriate for your hair type, as overheating can cause uneven results.

Static and Frizz

Static and frizz are common challenges, especially in humid environments. To mitigate these issues, use anti-frizz serums or leave-in conditioners before styling. Additionally, allow your hair to cool completely after curling and avoid touching the curls excessively, as this can disrupt their shape and increase frizz.

Lack of Hold

If your curls lack longevity, it may be due to insufficient cooling time or inadequate setting products. Ensure that each curl is fully cooled before manipulating it, as this helps set the shape. Incorporating a light-hold hairspray or setting spray can also enhance the curls’ durability, ensuring they last throughout the day.

The Future of Rotating Curling Irons

Technological Advancements

The future of rotating curling irons is poised for exciting advancements. Innovations such as smart temperature controls, integration with mobile apps for personalized styling, and improvements in energy efficiency are on the horizon. These developments will further enhance user experience, making hairstyling more intuitive and tailored to individual needs.

Sustainability and Eco-Friendly Designs

As consumer awareness of sustainability grows, manufacturers are increasingly focusing on eco-friendly designs. Future rotating curling irons may incorporate recyclable materials, energy-efficient components, and reduced carbon footprints. These sustainable practices not only benefit the environment but also appeal to environmentally conscious consumers seeking responsible beauty tools.

Expansion of Styling Options

Advancements in design and functionality are likely to expand the styling capabilities of rotating curling irons. Features such as interchangeable barrels, multi-directional rotation, and customizable settings will offer users a broader range of styling options, enabling the creation of diverse looks from sleek waves to voluminous curls with a single device.

rotating curling ironConclusion: Embracing the Rotating Curling Iron Revolution

The rotating curling iron represents a significant leap forward in hairstyling technology. By combining automation, precision, and user-friendly features, it simplifies the curling process while delivering consistent, high-quality results. Whether you’re aiming for loose waves or tight curls, this innovative tool adapts to various hair types and styling preferences, making it a versatile addition to any beauty arsenal. As technology continues to evolve, the rotating curling iron is set to become an indispensable device for achieving flawless, salon-worthy hairstyles at home. Embrace this revolutionary tool and transform your hairstyling routine with the unparalleled convenience and efficiency of the rotating curling iron.

Home Appliance Personal Care
Unveiling the Best Curling Iron: Your Guide to Gorgeous Curls

Achieving salon-quality curls at home has never been easier, thanks to the plethora of curling irons available on the market today. Whether you’re aiming for loose, beachy waves or tight, bouncy ringlets, the right curling iron can make all the difference. In this guide, we’ll delve deep into the features, benefits, and top picks of 2023’s best curling irons, helping you navigate your options and choose the perfect tool for your hair styling needs.

best curling iron Understanding the Importance of Choosing the Right Curling Iron

Selecting the ideal curling iron is pivotal for attaining the desired hairstyle while maintaining hair health. With so many options, it’s essential to comprehend the key factors that differentiate one curling iron from another.

Heat Settings and Their Impact on Your Hair

One of the foremost considerations when choosing a curling iron is the range of heat settings it offers. High heat can swiftly create curls, but it risks damaging your hair, leading to dryness and breakage. Conversely, lower temperatures are gentler, preserving hair integrity but might require more time to style.

Balancing Efficiency and Hair Health

The best curling irons provide adjustable heat settings, allowing you to customize the temperature based on your hair type. For fine or damaged hair, lower temperatures are advisable, while thicker, coarser hair can withstand higher heat.

Barrel Size: Defining Your Curl Type

The size of the curling iron’s barrel significantly influences the curl’s tightness and overall look. Smaller barrels generate tight ringlets, suitable for intricate styles, whereas larger barrels create loose waves, ideal for a natural, flowing appearance.

Choosing the Right Barrel for Your Desired Style

Consider your hairstyle goals when selecting a barrel size. If you prefer voluminous curls, opt for a larger barrel. For sleek, defined curls, a medium-sized barrel is ideal, and for petite, springy ringlets, a smaller barrel is the way to go.

Top Features to Look for in a Curling Iron

Beyond basic functionality, several advanced features can enhance your curling experience, making styling more efficient and enjoyable.

Advanced Ionic Technology for Smoother Curls

Ionic technology emits negative ions that help break down water molecules, resulting in smoother, frizz-free curls. This feature is particularly beneficial for those with humid hair or naturally frizzy textures.

Benefits of Ionic Curling Irons

  • Reduced Frizz: Enhances hair’s natural shine by minimizing frizz.
  • Faster Drying Time: Curls set more quickly, saving you time during your styling routine.
  • Enhanced Hair Health: Less heat damage due to efficient moisture retention.

Titanium vs. Ceramic: Which Material Reigns Supreme?

The material of the curling iron’s barrel affects heat distribution and styling ease. Titanium barrels heat up rapidly and distribute heat evenly, while ceramic barrels offer gentler heat, reducing the risk of hair damage.

Comparing Titanium and Ceramic Curling Irons

  • Titanium:
    • Pros: Quick heating, durable, even heat distribution.
    • Cons: Can cause more heat damage if not used properly.
  • Ceramic:
    • Pros: Gentle on hair, distributes heat uniformly, reduces frizz.
    • Cons: Slower heating time, may require a longer styling process.

Swivel Cords for Enhanced Maneuverability

A swivel cord allows the curling iron to rotate, preventing tangling and providing greater flexibility during styling. This feature is essential for achieving consistent curls without getting caught on clothing or surroundings.

best curling iron

The Best Curling Irons of 2023: Our Top Picks

After thorough research and analysis, we’ve curated a list of the best curling irons of 2023, each excelling in different aspects to cater to various styling needs.

1. Dyson Airwrap Styler

Why It’s a Top Contender

The Dyson Airwrap Styler stands out with its innovative technology, combining airflow and heat to create curls without extreme temperatures. It’s versatile, allowing for multiple styling options beyond curling.

Key Features

  • Intelligent Heat Control: Prevents hair damage by regulating temperature.
  • Multiple Attachments: Includes barrels of different sizes and brushes.
  • Advanced Airflow Technology: Curls hair using air rather than direct heat.

2. T3 SinglePass Curl

The Perfect Blend of Efficiency and Care

The T3 SinglePass Curl is renowned for its ability to create uniform curls quickly while minimizing heat exposure. Its ceramic technology ensures even heat distribution, protecting hair from damage.

Key Features

  • Unique Tourmaline Infusion: Enhances shine and reduces frizz.
  • Precision Temperature Control: Adjustable settings tailored to hair type.
  • Lightweight Design: Easy to handle for effortless styling.

3. BaBylissPRO Nano Titanium

Durability Meets High Performance

BaBylissPRO’s Nano Titanium curling iron is ideal for those seeking a durable tool that delivers professional-grade results. Its titanium barrel ensures quick heating and consistent performance.

Key Features

  • Ultra-Thin Barrel: Perfect for creating tight, defined curls.
  • High-Heat Performance: Reaches up to 450°F, suitable for thick or resistant hair.
  • Ergonomic Design: Comfortable grip for extended styling sessions.

4. Hot Tools Professional Ceramic Curling Iron

A Favorite Among Professionals

The Hot Tools Ceramic Curling Iron is a staple in many salons due to its reliability and excellent heat distribution. It offers a balanced performance suitable for various hair types.

Key Features

  • High-Quality Ceramic Barrel: Ensures even heat and smooth curls.
  • Adjustable Heat Settings: Customizable to suit different styling needs.
  • Swivel Cord: Enhances maneuverability during use.

5. Remington Curling Wand with Pearl Ceramic Technology

Affordable Excellence

For those seeking quality without breaking the bank, the Remington Curling Wand offers impressive features at an accessible price point. Its pearl ceramic technology provides even heat distribution, resulting in smooth, shiny curls.

Key Features

  • Pearl Ceramic Technology: Promotes healthier hair with gentle heat.
  • Various Barrel Sizes: Versatile for creating different curl styles.
  • Auto Shut-Off Feature: Ensures safety by turning off after a set period.

Tips for Maximizing Your Curling Iron’s Performance

To achieve the best results and prolong the life of your curling iron, consider these essential tips.

Preparing Your Hair for Curling

Always start with clean, dry hair. Using a heat protectant spray can shield your hair from potential damage and help maintain moisture levels during styling.

Essential Pre-Curling Steps

  1. Wash and Dry: Ensure your hair is thoroughly dry before curling.
  2. Apply Heat Protectant: Spray evenly to protect against heat damage.
  3. Detangle: Use a comb or brush to remove any knots, ensuring smooth curls.

Proper Curling Techniques

Mastering the right techniques can significantly enhance your curling results. Alternatives like twisting sections of hair around the barrel or using tension can create varied curl patterns.

Step-by-Step Curling Guide

  1. Section Your Hair: Divide your hair into manageable sections for even curling.
  2. Wrap and Hold: Take a small section, wrap it around the barrel, and hold for a few seconds.
  3. Release and Set: Gently release the curl and allow it to cool to set the shape.

Maintenance and Care for Longevity

Regular maintenance ensures your curling iron remains in optimal condition. Clean the barrel after each use to prevent product buildup, and store the iron in a safe, dry place to avoid damage.

Cleaning Tips

  • Wipe with a Soft Cloth: After cooling, gently wipe the barrel to remove residue.
  • Use Alcohol for Deep Cleaning: For stubborn buildup, use isopropyl alcohol on a cotton pad.
  • Avoid Water Exposure: Never immerse the curling iron in water to prevent electrical hazards.

Comparing Price Ranges: Finding Value in Quality

Curling irons come in a wide range of prices, each reflecting different features and quality levels. Understanding what you get at various price points can help you make an informed decision.

Budget-Friendly Options

Affordable curling irons often provide essential features suitable for occasional use. While they may lack advanced technologies, many budget options deliver satisfactory results for everyday styling.

Top Budget Picks

  • Remington Curling Wand with Pearl Ceramic Technology: Combines quality and affordability.
  • Conair Double Ceramic Curling Iron: Offers even heat distribution at a low cost.

Mid-Range Excellence

Mid-range curling irons strike a balance between quality and price, offering enhanced features without a hefty investment. These irons are ideal for regular users seeking dependable performance.

Notable Mid-Range Models

  • T3 SinglePass Curl: Delivers professional results with advanced heat control.
  • Hot Tools Professional Ceramic Curling Iron: A favorite for consistent, salon-like curls.

High-End Luxury

High-end curling irons come packed with cutting-edge features, superior materials, and exceptional performance. They are worth the investment for those who prioritize top-tier results and durability.

Premium Selections

  • Dyson Airwrap Styler: Renowned for its innovative technology and versatility.
  • Chi Spin N Curl Ceramic Curling Iron: Offers unparalleled heat distribution and styling efficiency.

best curling iron

User Experiences: What Real Users Are Saying

Hearing from actual users can provide valuable insights into a curling iron’s performance and reliability. Positive reviews often highlight ease of use, consistent results, and durability, while negative feedback may point out issues like uneven heating or cumbersome designs.

Common Praises

  • Ease of Use: Many users appreciate lightweight and ergonomic designs that make styling effortless.
  • Consistent Curls: High praise for irons that deliver uniform curls with minimal effort.
  • Heat Protection: Positive comments on models that protect hair from excessive heat damage.

Notable Complaints

  • Weight Issues: Some users find heavier curling irons tiring to use over extended periods.
  • Heating Time: A few models are criticized for taking too long to heat up.
  • Durability Concerns: Instances of curling irons malfunctioning after a short period.

Final Thoughts: Choosing the Best Curling Iron for You

In the quest for the best curling iron, it’s essential to consider your specific hair type, desired curl style, budget, and the features that matter most to you. Whether you prioritize advanced technologies like ionic and ceramic features, require a specific barrel size, or seek ease of use and portability, there’s a curling iron out there tailored to your needs.

To encapsulate, the Dyson Airwrap Styler stands out as the best curling iron of 2023, offering unparalleled versatility, innovative technology, and exceptional performance. However, other top contenders like the T3 SinglePass Curl and BaBylissPRO Nano Titanium also provide fantastic options for those seeking professional-grade results. By carefully evaluating your preferences and understanding the key features outlined in this guide, you’ll be well-equipped to select the best curling iron that not only delivers stunning curls but also maintains the health and vitality of your hair.

Home Appliance Personal Care
The Versatile Curling Iron: Your Guide to Gorgeous Waves

When it comes to hairstyling tools, the curling iron stands out as one of the most versatile and essential devices that can transform straight strands into bouncy, beautiful waves. Whether you’re preparing for a special occasion, a night out with friends, or you simply wish to elevate your daily look, mastering the curling iron technique can significantly enhance your style. In this guide, we will explore various types of curling irons, techniques for achieving your desired curls, tips for maintaining healthy hair, and potential styling mistakes to avoid.

curling iron

Understanding the Different Types of Curling Irons

Choosing the right curling iron for your hair type and desired style is crucial. With so many options available, it can be overwhelming. However, by breaking them down into categories, you can make an informed decision.

Barrel Sizes Matter

The barrel size of a curling iron directly impacts the type of curls you create. For instance, a smaller barrel, typically around ¾ inch, works well for tighter, more defined curls. In contrast, a larger barrel, such as a 1½ inch, allows for loose waves and soft curls. When selecting a barrel size, consider your hair length, texture, and the look you want to achieve.

Materials Used

Curling irons come in various materials, each offering unique benefits. For example, ceramic barrels distribute heat evenly, making them ideal for reducing heat damage and providing long-lasting curls. Titanium, on the other hand, heats up quickly and is excellent for thick, coarse hair. Tourmaline-infused irons emit negative ions that help reduce frizz and give your hair a glossy finish.

Clip vs. No Clip

Another important distinction is between clip and clipless curling irons. Clip irons are more beginner-friendly, as they securely hold the hair in place while you style. On the other hand, clipless, or wand-shaped curling irons, can create more natural-looking waves, but they require a bit more skill and practice to master.

Preparing Your Hair for Curling

Before reaching for your curling iron, it’s essential to prepare your hair properly. Neglecting this step can result in less-than-ideal outcomes.

Cleanse and Condition Your Hair

Always start with clean, conditioned hair. Using a sulfate-free shampoo and a hydrating conditioner can nourish your strands and make styling easier. Moreover, lightweight leave-in treatments can provide extra moisture without weighing your hair down.

Protect with Heat Protectant

Heat protectant sprays are your best friend when it comes to curling your hair. By applying a heat protectant to damp hair after washing, you create a barrier between your hair and the heat of the curling iron. This step is crucial to preserving the integrity of your hair over time.

Drying Techniques

For the best results, ensure your hair is completely dry before using the curling iron. If you’re in a hurry, use a blow dryer on a medium setting to avoid exposing your hair to excessive heat. Drying your hair thoroughly will provide a better hold for your curls.

Mastering the Curling Technique

Achieving beautiful curls isn’t just about having the right tools; it’s also about technique. Transitioning from a novice to an expert in curling irons can be a fun journey.

Sectioning Your Hair

Start by dividing your hair into manageable sections. Utilizing hair clips, create sections that are about one to two inches wide. Smaller sections can yield tighter curls, while larger sections provide looser waves. Remember, the key is consistency; try to curl similar-sized sections for a uniform look.

The Curling Process

To curl your hair, wrap the section around the barrel of the curling iron, starting from the base and moving towards the ends. For defined curls, hold the hair for about 10 to 15 seconds, and for loose waves, you can reduce the curling time to about 5 to 7 seconds. Be mindful of how tightly you wrap your hair around the barrel. If you desire beachy waves, wrapping your hair loosely can help achieve that effect.

Alternating Directions

When curling your hair, consider alternating the direction of the curls. This technique adds volume and dimension, preventing the curls from clumping together. For instance, you can curl the first section towards your face and the next away from your face. By varying the direction, you’ll create a more natural and effortless appearance.

curling iron

Finishing Touches: Setting Your Curls

After curling, it’s time to finish and set your curls to ensure they last throughout the day.

Letting the Curls Cool

Once you release each curl from the iron, refrain from touching it immediately. Allow the curl to cool in your hand or pin it in place for a few seconds. This process helps to lock the shape of the curl, increasing its longevity.

Styling Products for Hold

Incorporating the right styling products will help maintain your curls. Light-hold hairsprays are perfect for setting your style without weighing it down. If you prefer a more tousled, beachy look, consider using a texturizing spray or sea salt spray after the curls have cooled. These products will enhance the texture and provide a more laid-back finish.

Avoiding Humidity

If you know you’ll be out in humid conditions, consider using an anti-humidity spray before styling. This can help to keep your curls intact and prevent them from falling flat throughout the day.

Caring for Your Hair After Curling

Your hair’s health is essential, especially after using heat styling tools like curling irons. It’s vital to adopt a post-curling care routine.

Hydration is Key

Using a hydrating hair mask or deep conditioning treatment at least once a week can help restore moisture levels in your hair. Additionally, products containing argan oil, coconut oil, or shea butter are excellent for nourishing and revitalizing your locks.

Regular Trims

Regular trims are crucial for maintaining the health of your hair, especially if you use heat styling tools frequently. Aim for a trim every six to eight weeks to prevent split ends and keep your hair looking fresh and vibrant.

Staying Away from Daily Heat

While curling irons are fun to use, it’s important to give your hair a break. Try alternating styles and embrace your natural texture from time to time. Allowing your hair to rest from heat will ultimately contribute to its health over time.

Common Mistakes to Avoid

Despite the best intentions, styling hair with a curling iron can lead to mistakes. Let’s discuss a few common pitfalls and how to sidestep them.

Using Too Much Hair

One common mistake is trying to curl too much hair at once. Larger sections can lead to uneven curls and a less polished finish. By sticking to smaller sections, you’ll achieve more defined and controllable curls.

Not Adjusting the Heat Settings

Another blunder is not adjusting the heat settings based on your hair type. If you have fine or damaged hair, using high heat can cause irreversible damage. Conversely, if you have thick hair, too low a setting may not curl effectively. Tailoring the temperature to your unique hair is essential.

Being Too Rough

It’s easy to become impatient when curling hair, but being rough while styling can damage your strands. Always be gentle when wrapping hair around the barrel and unruly as you release each curl. Taking your time will ensure healthier hair and beautiful results.

curling ironThe Final Touch: Embracing Your Curls

In the end, curling your hair with a curling iron is an art that requires practice and patience. Embrace the beautiful styles you create and don’t be discouraged by any missteps along the way. With the right curling iron and the knowledge you gained here, you now have the tools to achieve stunning waves with ease.

In summary, mastering the curling iron opens a world of hairstyling possibilities. You can experiment with different techniques, barrel sizes, and products to discover what works best for your unique style. Remember, the journey to perfecting your curlicues is as exciting as the final look. So grab your curling iron and unleash your creativity!