Home Appliance Personal Care
Create Comfort with Ease: How to Make Homemade Heating Pad

Materials Needed for Homemade Heating Pads

Creating homemade heating pads requires simple, easily available materials. Start by selecting quality fabric and safe filler materials.

homemade heating pad

Choosing the Right Fabric

For homemade heating pads, the right fabric is crucial. Opt for natural fibers like cotton or flannel. These materials can withstand heat and are comfortable against the skin. Ensure the fabric is clean and free of any treatments or dyes that might react when heated.

Selecting Filler Materials

The effectiveness of your homemade heating pad hinges on the fillers. Common fillers include rice, wheat, or dried beans. These materials retain heat well and conform to the body’s shape. Ensure that the fillers are dry and free from any pests or contaminants before use.

Step-by-Step Guide to Making a Heating Pad

Following a step-by-step guide helps ensure that your homemade heating pad turns out perfect. Below, I’ll outline the key steps to creating a heating pad that provides comfort and relief right at home.

Preparing the Fabric

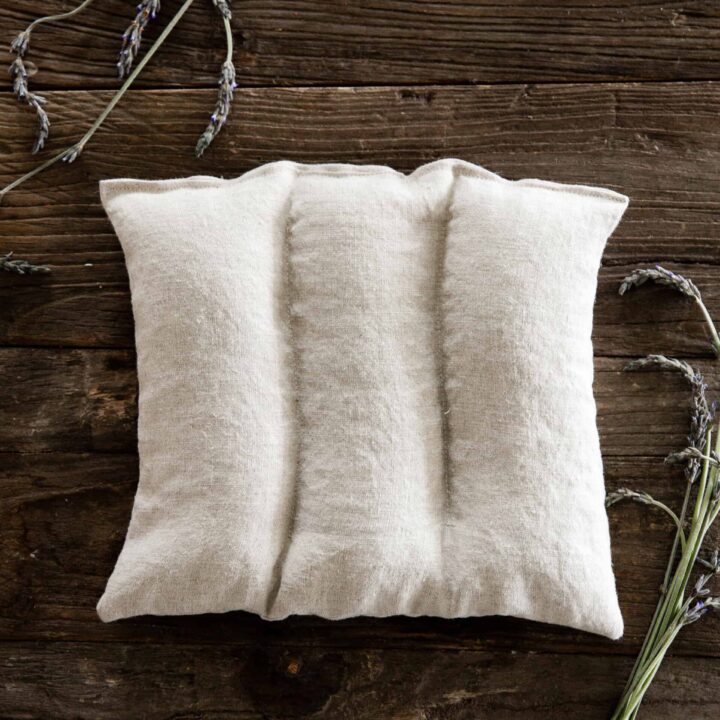
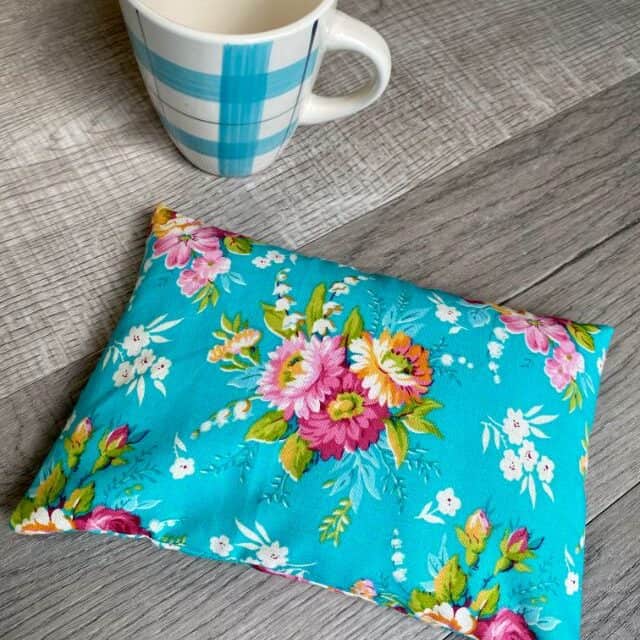
First, cut your fabric to the desired size. A standard size is 20 by 10 inches but adjust based on your needs. Fold it in half with the right sides facing each other and iron it flat. Then, stitch three of the sides together, leaving one short side open for the fillers. Turn the fabric right-side out to prepare for filling.

Filling and Sealing the Pad

Next, choose your filler – rice, beans, or wheat are great options. Use a funnel or a spout to pour the filler into the fabric pouch, filling it to about two-thirds full. This allows room for the material to move and conform to your body. Once filled, sew the open end shut, ensuring a secure closure to prevent spills.

Remember, as you learn how to make a homemade heating pad, precision and patience are key. This simple project not only offers therapeutic benefits but also gives you a satisfying sense of self-reliance and creativity.

Types of Homemade Heating Pads

Once you understand how to make a homemade heating pad, exploring different types can be fun.

Rice-filled Heating Pads

Rice-filled heating pads are popular for their simplicity and effectiveness. Begin by filling the fabric pouch with uncooked rice. Make sure it’s dry and free from any dirt. These pads are easy to heat in the microwave. Usually, a minute or two on high will suffice. Rice holds heat well, delivering warmth to your muscles for a relaxing experience. Remember to check the temperature before use to avoid burns.

Bean-filled Heating Pads

Another great option is the bean-filled heating pad. Use any dry beans, such as lentils or peas. Beans are also excellent at retaining heat. They offer a heavier weight, which can be soothing for deep-tissue comfort. Heat these the same way as the rice pads. Be sure to shake the pad evenly to distribute the heat before applying to your body. Both rice and bean-filled heating pads mold to your shape, targeting relief where it’s needed most.

Using Essential Oils in Your Heating Pad

Incorporating essential oils into your homemade heating pad can greatly enhance the relaxation experience. The addition of these aromatic compounds can provide therapeutic benefits and a more sensory-driven relief.

Benefits of Adding Essential Oils

Adding essential oils to your heating pad offers multiple advantages. Firstly, they can induce relaxation and reduce stress. Align this benefit with the heat’s soothing effect for double the comfort. Essential oils can also help alleviate muscle tension, making your heating pad even more effective. Lastly, the pleasant fragrances can elevate your mood and create a calming atmosphere in your home.

It’s important to understand how to safely incorporate essential oils into your homemade heating pad. Always make sure to use only skin-safe, high-quality oils and to test for any skin reactions before using the heating pad on a larger area.

Recommended Essential Oils

When deciding which essential oils to use, select according to the benefits you seek. For relaxation and stress relief, lavender or chamomile are ideal choices. Eucalyptus and peppermint can offer pain relief and reduce inflammation, making them suitable for muscle aches. For a comforting, warming scent, consider cinnamon or ginger. Just add a few drops of your chosen oil to the filler before sewing the heating pad shut.

It’s essential to note that children and pets may be sensitive to certain essential oils, so take precautions when using and storing your scented heating pad. Mix and match different oils to find the blend that works best for you and enjoy the added luxury in your DIY self-care routine.

homemade heating padSafety Tips for Using DIY Heating Pads

Proper usage of homemade heating pads is key to ensuring safety and comfort. Here are some essential safety tips to follow.

Temperature Considerations

Start by warming your DIY heating pad at a low temperature. Check the heat level before placing it on your body to avoid burns. Microwave heating times may vary, so find the ideal time that makes the pad warm, not hot. Never use a homemade heating pad on bare skin. Always place a layer of cloth between the pad and your skin.

Usage Duration and Frequency

Use heating pads for short periods, generally for up to 20 minutes at a time. Allow your skin to cool down before reapplying. Avoid using the heating pad while sleeping to prevent prolonged heat exposure. Listen to your body—if discomfort arises, remove the pad immediately.

How to Care for Your Homemade Heating Pad

Proper care extends the life of your heating pad. Here’s how to keep it in top shape.

Cleaning Tips

Your homemade heating pad needs careful cleaning. If the fabric cover is removable, wash it separately in cold water and air dry. For non-removable covers, use a damp cloth to spot clean. Never immerse the heating pad in water. The fillers can’t get wet. Always ensure the heating pad is fully dry before use.

Storage Suggestions

When not in use, store your heating pad in a cool, dry place. Avoid direct sunlight and damp areas to prevent mold and bad smells. A drawer or cabinet works well. Make sure the pad is cool and dry before storing. This keeps it ready for the next use.

Crafting Heating Pads as Gifts

Homemade heating pads make thoughtful, personalized gifts. Here’s how to craft them beautifully.

Personalization Tips

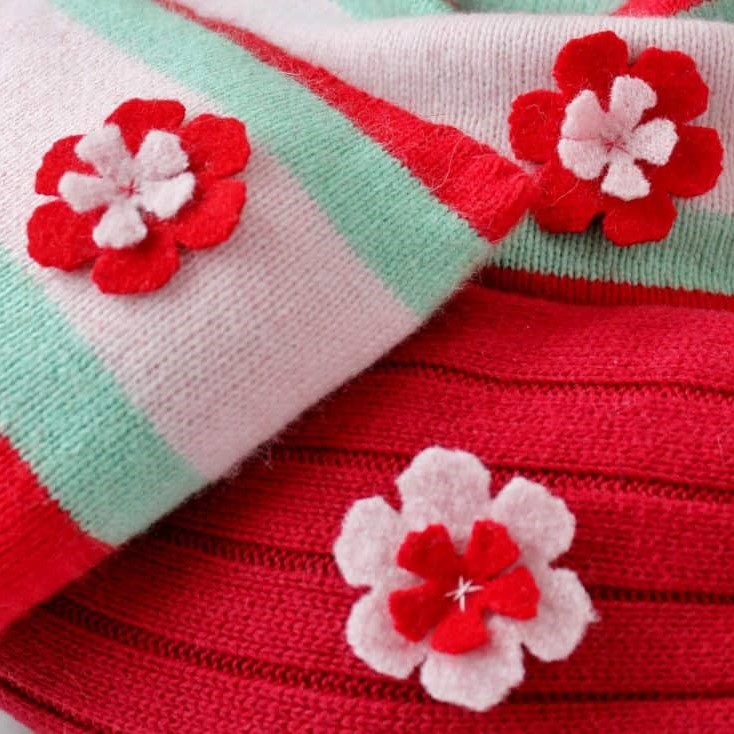
  • Choose Themed Fabrics: Select fabrics that resonate with the recipient’s interests or favorite colors. For a friend who loves nature, consider a floral or leafy pattern.
  • Add Embroidery or Appliques: Personalize the heating pad with initials, a meaningful quote, or a simple image using embroidery or fabric appliques. This adds a unique touch.
  • Include Custom Scents: Use the recipient’s favorite essential oils when making the pad. Lavender for relaxation or peppermint for rejuvenation are excellent choices.
  • Create Various Sizes: Craft different sizes for different uses, such as a small pad for neck relief or a larger one for back pain.

Gift Wrapping Ideas

  • Fabric Gift Bags: Make or buy a fabric bag that complements the heating pad’s design. It’s reusable and eco-friendly.
  • Decorative Boxes: Place the heating pad in a decorative box with tissue paper. Add dried flowers or a ribbon for a classic touch.
  • Custom Tags: Attach a custom tag with instructions on how to use and care for the heating pad.
  • Themed Packaging: If it’s a holiday gift, use wrapping themes that match the season, like Christmas or Valentine’s motifs.

Making a homemade heating pad and presenting it beautifully shows care and thoughtfulness, making your gift extra special.

homemade heating padConclusion: Elevate Your Relaxation with Your Homemade Heating Pad

Creating your own heating pad allows for both customization and cost savings. By selecting the right materials and following the outlined steps, you can craft a heating pad that meets your specific comfort needs. The ability to choose your preferred filling, fabric, and optional aromatics makes your homemade creation truly personalized.

If you are feeling sore or just want to relax, follow this guide on how to make homemade heating pad and enjoy the warmth and comfort it brings. Indeed, with a little effort, you’ll have your very own heating pad ready to soothe and heal.

Home Appliance Personal Care
DIY Heating Pad Guide: Soothe Aches at Home

Introduction: The Benefits of a Homemade Heating Pad

Discovering how to make a heating pad at home can offer a range of comforting benefits. These easy-to-create pads provide warmth and relief for common aches and pains. With just a few simple items, you can create a source of heat that is both cost-effective and readily available whenever you need it.

a heating pad

Here are the key advantages of crafting your own heating pad at home:

  • Cost-Effective: Store-bought heating pads can be expensive. Making your own is often a fraction of the price.
  • Customizable: You can choose the size, shape, and filling based on your specific needs and preferences.
  • Convenience: A homemade heating pad can be made quickly and does not require a trip to the store. You likely have everything you need already.
  • Natural Relief: Using natural materials for your heating pad, like rice or beans, provides gentle and effective relief.
  • Control Over Heat Levels: When you make it yourself, you can adjust how warm you want your pad to be.
  • Eco-Friendly: Reusing fabrics and materials to create your heating pad is good for the environment.
  • Therapeutic: Heating pads can help alleviate stress and muscle tension after long hours at a desk or physical activity.

By understanding how to make a heating pad at home, you’re equipped to handle sudden discomfort with ease. You can give yourself the warmth and relief needed without waiting or overpaying for commercial options.

Required Materials: What You Need to Get Started

Gathering the right materials is the first step in learning how to make a heating pad at home. You’ll need a few basic items that are likely already available in your home, making this project both convenient and budget-friendly.

  • Fabric: Any soft, non-synthetic fabric will do. An old cotton sock or a fabric scrap works well.
  • Filling: Common fillings include rice, wheat, or dried corn. Choose based on availability and personal preference.
  • Thread or String: This is used to securely close the fabric after filling it.
  • Scissors: Needed for cutting fabric to size if necessary.
  • Measuring Cup: Helps measure the correct amount of filling.
  • Funnel (optional): A funnel can make it easier to pour the filling into the fabric.

These simple materials are all you need to start crafting your own heating pad. The process is straightforward and the materials are simple and inexpensive. This makes it easy to begin your project without a trip to the store.

Step-by-Step: Crafting Your Heating Pad

Creating your own heating pad is a simple process. Here is a step-by-step guide to follow:

  1. Select a Fabric:Choose a sock or fabric piece. Ensure it’s 100% cotton to prevent melting.
  2. Prepare the Filling:Measure out your filling; rice is a good choice. You’ll need about one to two cups.
  3. Fill the Fabric:Pour the filling into your fabric. A funnel helps avoid spills.
  4. Seal the Pad:Secure the open end with thread or string. Make sure it’s tight to keep the filling in.
  5. Heat the Pad:Place the pad in the microwave. Start with 30-second intervals. Check the heat level between each.
  6. Test the Temperature:Always feel the pad with your hands before use to prevent burns.
  7. Enjoy the Heat:Apply the pad to your sore areas. Relax and let the warmth soothe your aches.

Remember to follow these steps carefully each time you learn how to make a heating pad at home. This way, you’ll ensure the ideal combination of safety and comfort.

Safety Considerations for DIY Heating Pads

When learning how to make a heating pad at home, safety is paramount. To ensure a safe experience with your DIY heating pad, keep the following considerations in mind:

  • Material Selection: Only use 100% cotton or natural fibers. Synthetic materials can melt.
  • Microwaving: Never overheat. Start with short intervals and check the temperature.
  • Avoid Wet Filling: Ensure the filling is completely dry to prevent fire risks.
  • Overfilling: Do not overfill. This may cause uneven heating and possible burns.
  • Sealing: Secure the pad well to prevent any spillage of hot contents.
  • Inspection: Before each use, check for wear and tear that could lead to leaks.
  • Supervised Use: Never leave a heating pad unattended while heating.
  • Skin Contact: Always wrap the pad in a towel or cloth to avoid direct skin contact.

By following these tips, you create a safe and comfortable environment to enjoy the benefits of your homemade heating pad.

a heating padUsage Tips: Maximizing Comfort and Relief

When you know how to make a heating pad at home, using it right is key. Here are easy tips to maximize comfort and relief with your DIY heating pad:

  • Wrap in Cloth: Use a thin towel or cloth to wrap your heating pad. This prevents skin irritation.
  • Adjust Temperature: If the pad is too hot, let it cool for a bit. It should feel warm, not burning.
  • Position Correctly: Place the pad on sore spots. Avoid using it on areas with reduced sensation.
  • Move Regularly: Don’t keep the heating pad in one place too long to avoid overheating the skin.
  • Use as Needed: You can heat and apply the pad multiple times throughout the day.

By following these usage tips, your homemade heating pad can give the same comfort as store-bought ones.

Alternative Filling Options for Your Heating Pad

When crafting your DIY heating pad, you can choose from various filling materials. Each option offers unique benefits. Here is a list of alternative fillers that you might want to consider:

  • Cherry Pits: These retain heat well and emit a pleasant, subtle scent when warmed.
  • Flaxseed: Flaxseeds provide a smooth, comfortable texture. They also retain heat effectively.
  • Buckwheat: Buckwheat is another excellent choice. It heats evenly and holds temperature for a long time.
  • Barley: Barley is cheap and heats up quickly. This makes it a practical filler.
  • Oatmeal: Oatmeal is soft and molds well to the body. It provides soothing heat.
  • Sand: Sand is a dense material that holds a lot of heat. However, it’s heavier.

The choice of filling affects how your heating pad functions. Different materials have different heat retention capabilities and comfort levels. Experiment with these options to find what works best for you. Remember, the filling should always be dry to ensure safety and effectiveness.

Caring for Your Heating Pad: Cleaning and Maintenance

Caring for your homemade heating pad is simple but vital. Proper maintenance extends its life and ensures safety. Here’s what to do to keep your heating pad in top shape:

  • Keep Dry: Always store your pad in a dry place. Moisture can spoil the filling.
  • Regular Inspection: Check for tears or weak seams. Repair them right away to avoid spills.
  • Wash Carefully: If your pad’s fabric is removable and washable, clean it as needed. Hand wash to avoid damage.
  • Avoid Submerging: Never soak the entire pad. The fillings inside should not get wet.
  • Refreshing Fillings: Over time, fillings may lose their ability to hold heat. Replace them if needed.
  • No Harsh Chemicals: Use gentle soaps for cleaning. Harsh chemicals can damage the pad.

By following these care instructions, you can enjoy the warmth and comfort of your homemade heating pad for many aches to come. Regular maintenance keeps it safe and efficient. Whenever you learn how to make a heating pad at home, remember that its longevity largely depends on how well you take care of it.

a heating padFinal Thoughts: Embracing the Comfort of a DIY Solution

As we’ve explored the process of creating a homemade heating pad, it’s clear that the comfort and relief provided by this DIY solution can rival that of store-bought alternatives. Knowing how to make a heating pad at home offers not just warmth, but also a sense of accomplishment and control over your own comfort.

With your own heating pad, you can:

  • Adjust the temperature to suit your body’s needs.
  • Choose fillings that conform to your personal preferences.
  • Save money while still enjoying the therapeutic benefits.
  • Apply the pad whenever needed without worry about accessibility.

Best of all, by using materials that are likely already in your home, you’ve created a customized solution that is both eco-friendly and beneficial for your well-being.

By following the steps, safety tips, and care instructions provided, you’ve learned to craft a heating pad that is safe, effective, and tuned to your specific needs. Embrace the homemade approach and find comfort in the knowledge that you can alleviate your aches with something made from the heart. A DIY heating pad is a simple yet powerful tool to soothe your pains and unwind after a long day.

Keep experimenting with different fillings and fabrics to optimize your heating pad. With each use, you’ll appreciate the warmth and relief that comes from a handcrafted creation. Cheers to many cozy moments ahead with your new, homemade source of heat!

Home Appliance Personal Care
Heating Pad DIY: How to Create Your Own Comfortable Relief

There’s something incredibly soothing about the gentle warmth of a heating pad. Whether you’re dealing with muscle aches, cramps, or simply want to relax during a chilly evening, a heating pad can be an invaluable companion. However, store-bought heating pads can often come with a hefty price tag or may lack the features you want. That’s where a heating pad DIY project becomes a fantastic solution. In this article, we will walk you through various methods to create your own heating pad, ensuring you have all the information you need to get started.

Understanding the Benefits of Heating Pads

Relief for Muscle Pain

Heating pads are primarily used for pain relief. The heat provides a comforting sensation that helps relax the muscles, which can reduce tension and alleviate pain. This is particularly beneficial for people suffering from chronic conditions such as arthritis or fibromyalgia.

Easing Menstrual Cramps

For many women, menstrual cramps can be debilitating. A heating pad can help relieve discomfort associated with this monthly challenge. The warmth increases blood flow to the area and helps relax the muscles temporarily.

Enhancing Blood Circulation

Heat applications can improve blood circulation significantly. This is especially beneficial for those who have poor circulation or suffer from conditions such as Raynaud’s disease. Improved blood flow can promote healing and enhance recovery from injuries.

Promoting Relaxation and Stress Relief

In our fast-paced lives, relaxation is essential. Using a heating pad while you unwind can help reduce stress levels. The heat can ease tension in the body, making it easier for you to relax and settle into your evening routine.

heating pad diy

Materials You Will Need

Before you dive into your heating pad DIY project, it’s essential to gather the right materials. Below is a comprehensive list of what you’ll need for various types of heating pads.

Fabric Choices

Cotton

Cotton is a breathable and skin-friendly material, making it an excellent choice for a heating pad. It’s comfortable to the touch and can withstand repeated heating cycles without deteriorating.

Fleece

Fleece is warmer than cotton and feels soft to the skin. It holds heat very well, so it might be suitable for those who prefer a more intense warmth.

Muslin

Muslin is another good option. It’s lightweight and allows the heat to permeate effectively. One downside is that it may not provide as much warmth as fleece.

Filling Materials

Rice

One of the most popular choices for filling your DIY heating pad is rice. It can retain heat for a long time and conforms well to body contours.

Wheat

Wheat bags can also be an excellent option. Like rice, they hold heat effectively, but they tend to have a more pleasant smell when heated.

Flaxseed

Flaxseed is another filling material often used. It has the added benefit of being effective at holding low heat for extended periods.

Optional Materials

Essential Oils

If you want to add aromatherapy to your DIY heating pad, consider using essential oils. Lavender, eucalyptus, or chamomile can impart a soothing scent to enhance relaxation.

Thread and Needle

You’ll need these to sew your fabric pieces together securely. Alternatively, if you’re comfortable with a sewing machine, that would make the process quicker.

Step-by-Step Guide: Making a Basic Rice Heating Pad

Creating a basic rice heating pad is relatively straightforward. Here are the steps you can follow:

Choosing the Size

Decide on the size of your heating pad. A common size for a personal pad is around 12 by 6 inches, but you can adjust this based on your needs.

Cutting the Fabric

Cut two pieces of fabric into the desired dimension. Make sure to leave an extra half-inch on all sides for seam allowances (total dimensions will be 13 by 7 inches if making a 12 by 6 pad).

Sewing the Edges

With the fabric pieces placed facing each other, sew along three sides, leaving one short side open for filling. Remember to backstitch at the start and end to secure your seams.

Filling the Pad

Turn the fabric right-side out, and fill it with rice. It’s best to fill it about three-quarters full to allow room for the rice to move and distribute evenly when you heat it.

Closing the Pad

Once filled, fold in the raw edges of the open side, pin them in place, and sew shut. Make sure your stitches are tight to prevent any filling from escaping during use.

Optional Step: Adding Essential Oils

If you want a soothing scent, now is a great time to add a few drops of your favorite essential oil to the rice. Mix it thoroughly before sealing the pad completely.

heating pad diy

How to Heat Your DIY Heating Pad

Microwave Method

Most DIY heating pads are designed to be heated in the microwave. Place your rice-filled pad in the microwave for 1 to 2 minutes. It’s often best to start with a shorter time and check the warmth; you can heat it more if necessary.

Oven Method

If you prefer not to use a microwave, you can heat your pad in the oven. Preheat your oven to 200°F (about 93°C), and wrap your heating pad in aluminum foil to prevent direct contact with the oven. Leave it in for about 15 minutes.

Cautionary Measures

Always test the temperature before applying your heating pad to bare skin. If it feels too hot, allow it to cool for a few moments. Never leave a heating pad unattended in the microwave or oven.

Creative Variations of DIY Heating Pads

Once you’ve mastered the basic rice heating pad, consider experimenting with some creative variations.

Lavender-Scented Wheat Bag

Replace the rice with wheat grain and add dried lavender for a calming aroma. The combination of heat and scent can create a relaxing experience that’s perfect for helping you unwind.

Flannel-Filled Heating Pad

Use flannel fabric for an extra-soft touch and fill it with flaxseed. This alternative pad will provide similar benefits while offering a unique texture and feel.

Water Bottle Heating Pad

A less permanent option is to use a hot water bottle. You can fill it with boiling water, wrap it in a towel, and place it on the desired area. This method is ideal if you need immediate relief without craft supplies.

heating pad diyOther Uses for DIY Heating Pads

Pet Comfort

DIY heating pads aren’t just for humans. If you have pets that suffer from arthritis or other ailments, a heating pad can provide comfort and relief. Just ensure you monitor the temperature, as animals may be more sensitive to heat.

Cold Therapy

On the flip side, you can also make a cold therapy pad. Simply store the filled bag in your freezer for a few hours. This method can help reduce swelling and soothe sore muscles after intense workouts.

Gift Ideas

Homemade heating pads make thoughtful gifts, especially if personalized with fabric that resonates with the recipient’s style. You can also package them with essential oils, creating a spa experience at home.

Maintenance Tips for Your DIY Heating Pad

Cleaning

Over time, your heating pad may become dirty or develop odors. To clean it, consider spot-cleaning with a damp cloth and mild detergent. Avoid immersing it in water, as this can damage the filling.

Inspect Regularly

Regularly check your heating pad for any signs of wear and tear. If you notice any stitching coming undone or fabric fraying, it’s essential to repair it before the pad is used again.

Label for Safety

If making several types of heating pads, consider labeling each one with its intended use and notes on heating instructions. This can prevent the risk of accidents and ensure you get the best results.

Conclusion

Creating your own heating pad DIY is not only a cost-effective solution, but it also provides the opportunity to customize your pad to suit your needs and preferences. From material choices to filling options, the possibilities are endless. You can enjoy soothing relief for muscular tension, menstrual cramps, and daily stress—all from the comfort of your home. So, gather your materials, follow the steps outlined, and craft the perfect heating pad that’s just right for you. With your customized heating pad in hand, you can enjoy a world of comfort and relaxation whenever you need it.